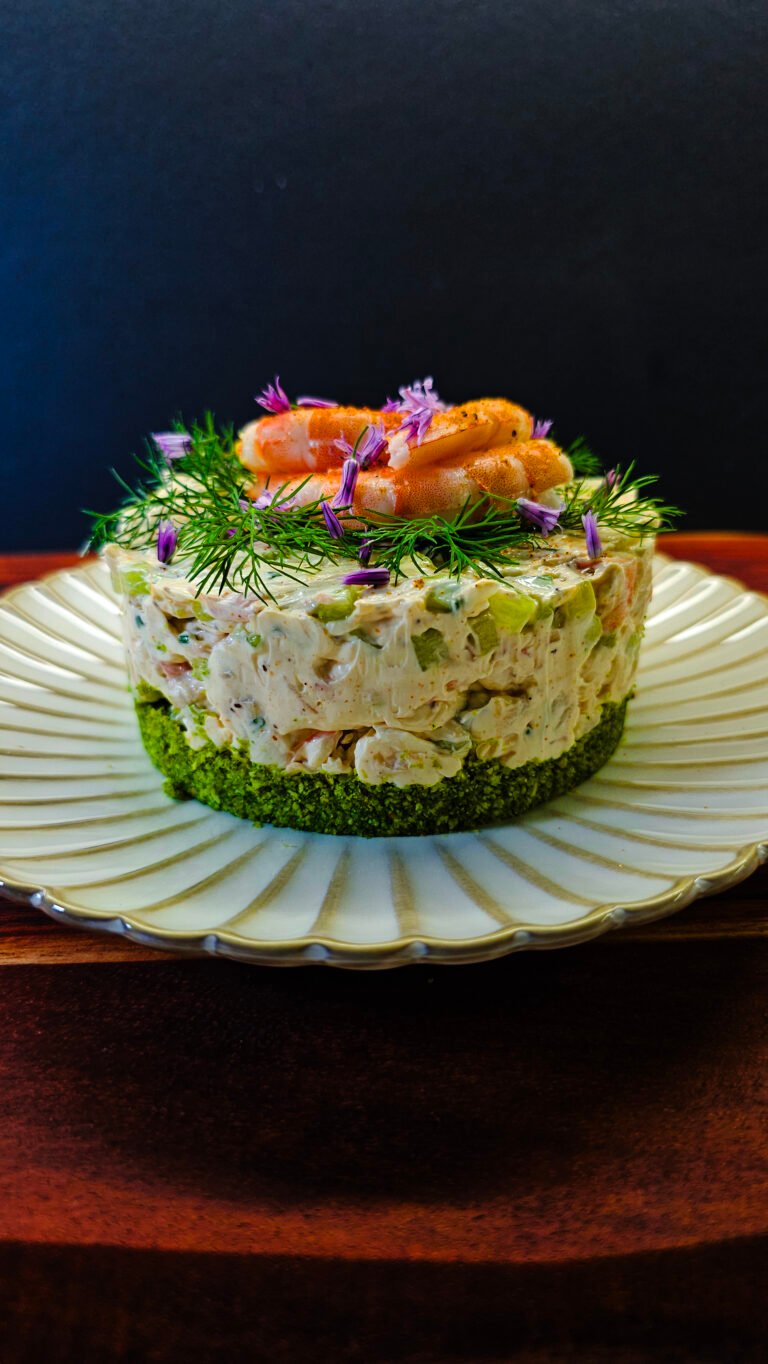
(An elegant ricotta and pea appetizer that looks restaurant-level but is incredibly simple to make at home)

There are certain recipes that instantly make you feel like you’ve stepped into a beautiful little restaurant… the kind where everything is plated just a little too perfectly, and you almost hesitate before taking the first bite.
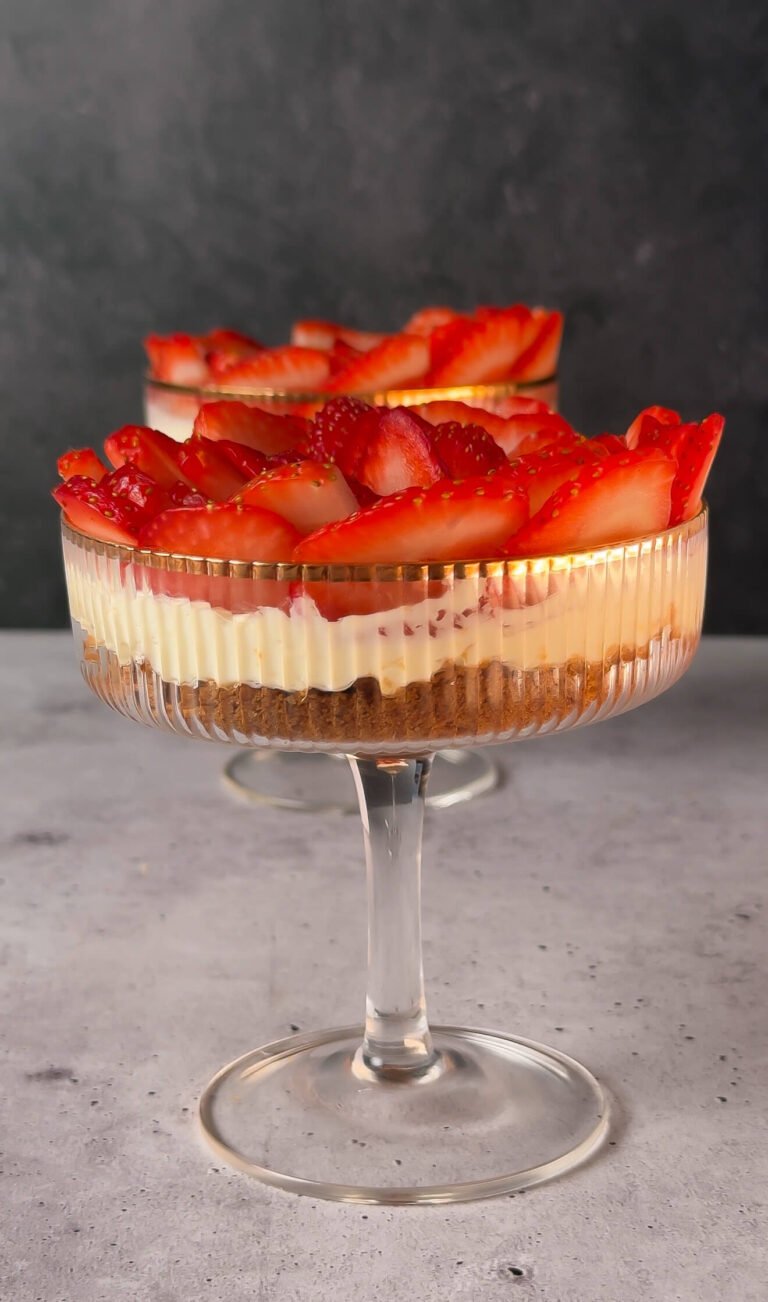
This ricotta pea timbale is exactly that kind of dish.
And yet – it’s made with some of the simplest ingredients you probably already have in your fridge.
I’ve been leaning heavily into recipes like this lately. The kind that feel elevated and elegant, but don’t require anything complicated or fussy. Because honestly, those are the recipes that people actually make – and more importantly, repeat.
This one came together on a day when I had ricotta, a bag of peas, and a couple slices of prosciutto that needed to be used. I didn’t overthink it (which is usually when the best recipes happen), and what came out of it is something I’ve already made multiple times since.
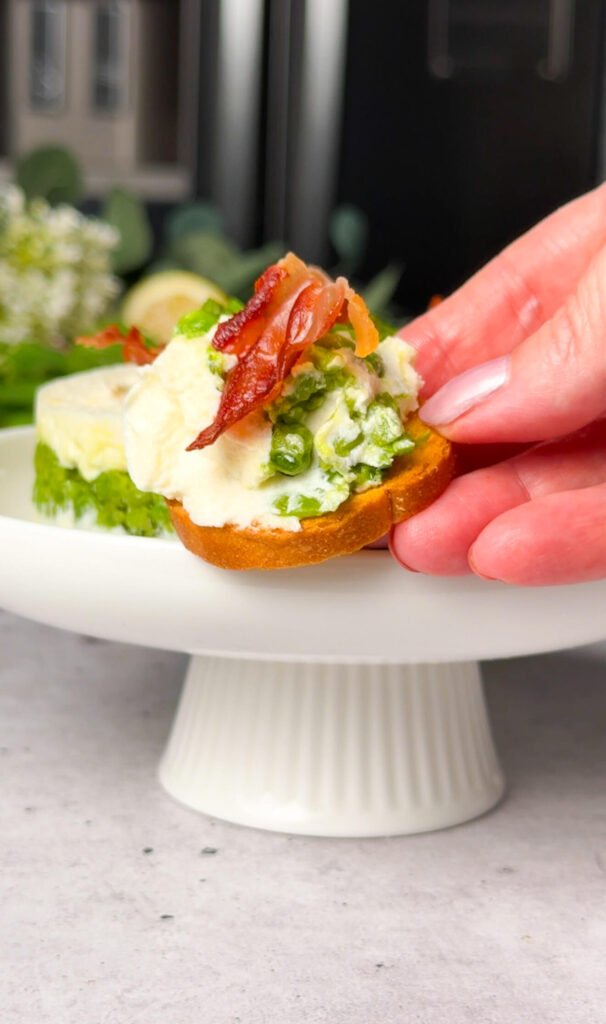
It’s creamy, fresh, slightly sweet from the peas, bright from the lemon, and finished with that salty, crispy prosciutto that just brings everything together.
If you’re looking for a beautiful spring appetizer, something for entertaining, or even just a quiet “this feels fancy but I didn’t try too hard” lunch – this is it! For another fresh, spring-ready appetizer, try my Green Goddess Deviled Eggs.
Why This Ricotta Pea Timbale Works So Well
There’s a reason this combination feels so balanced, and once you understand it, you can recreate this kind of dish over and over with different variations.
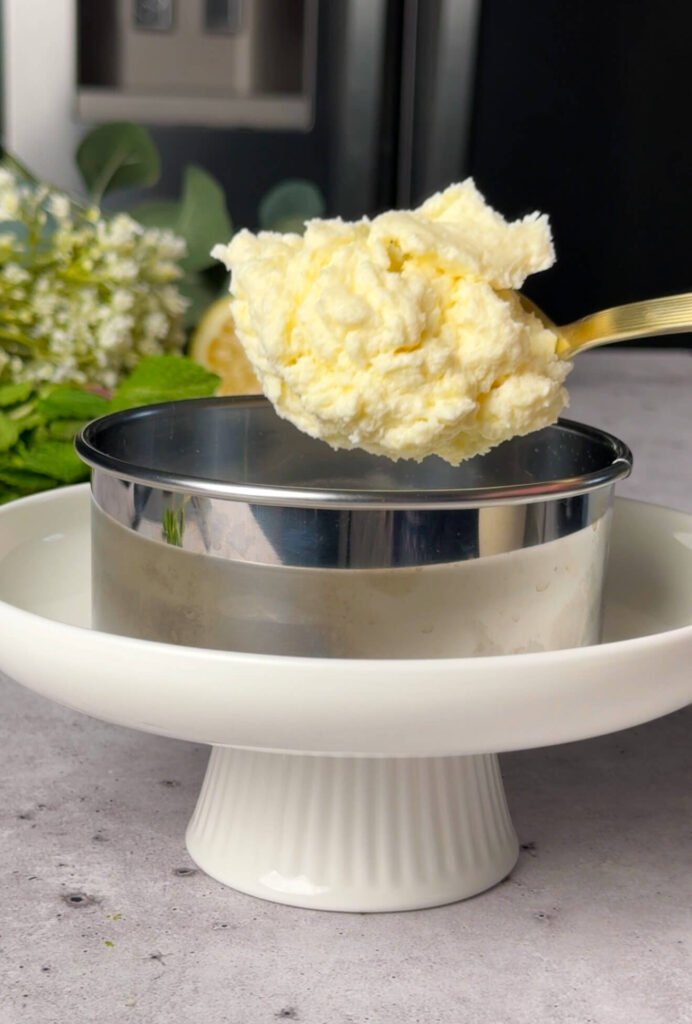
The ricotta layer is soft, creamy, and slightly rich, but not heavy. Mixing it with cream cheese gives it structure so it holds its shape (this is key for that clean timbale look), while olive oil and lemon zest keep it light and fresh.
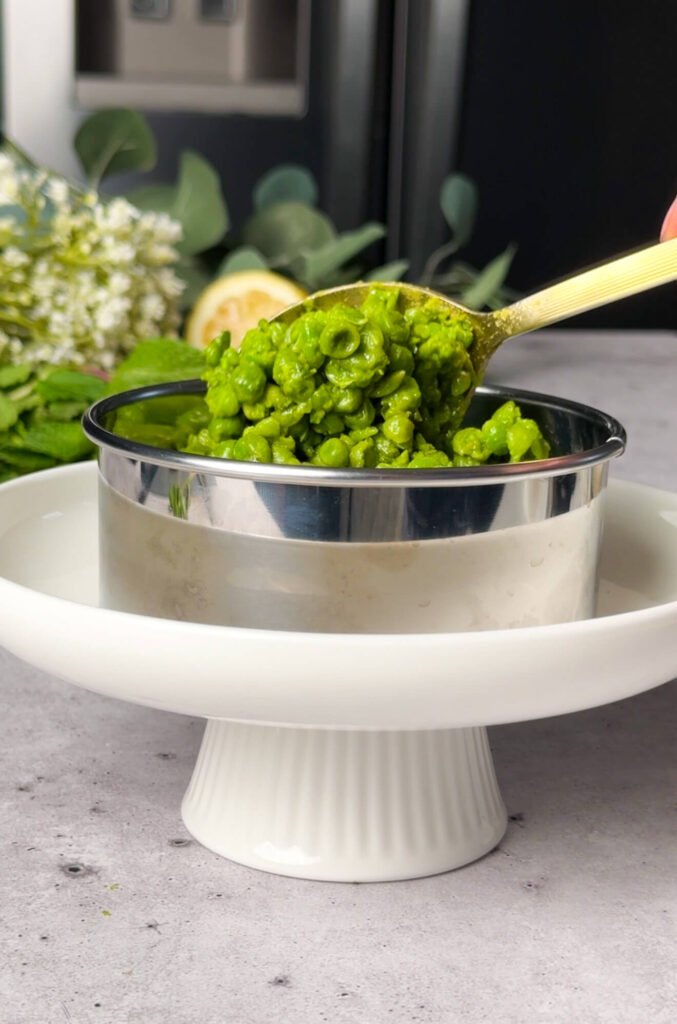
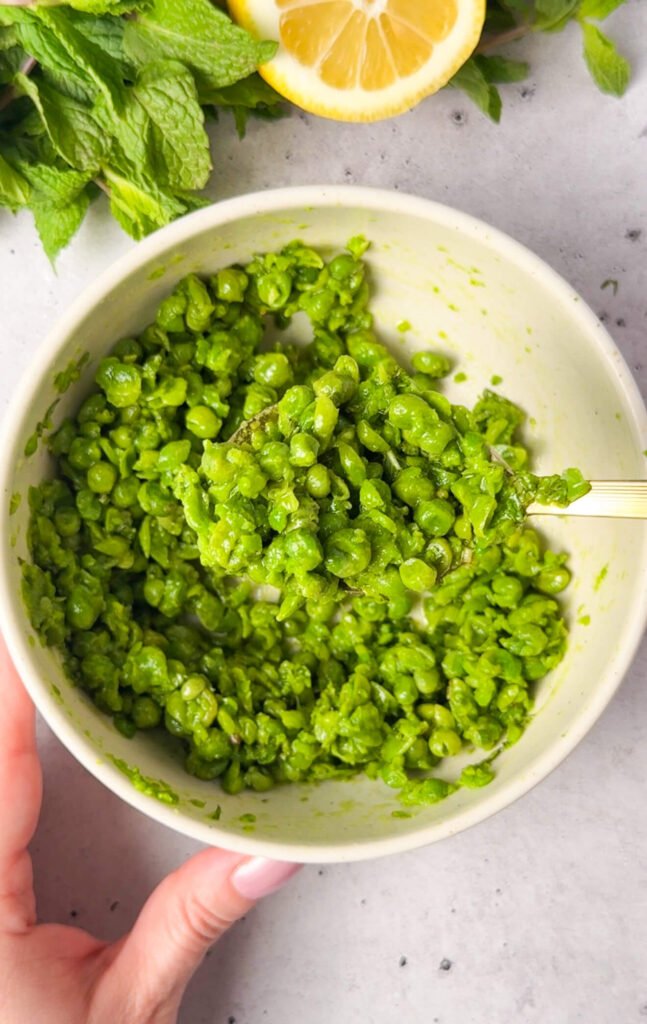
The pea layer is where the texture really comes in. It’s not a puree – and that matters more than you think. Keeping some of the peas whole creates contrast and keeps the dish from feeling flat.
Then there’s the prosciutto. Crispy, salty, and just slightly intense – it cuts through the creaminess perfectly.
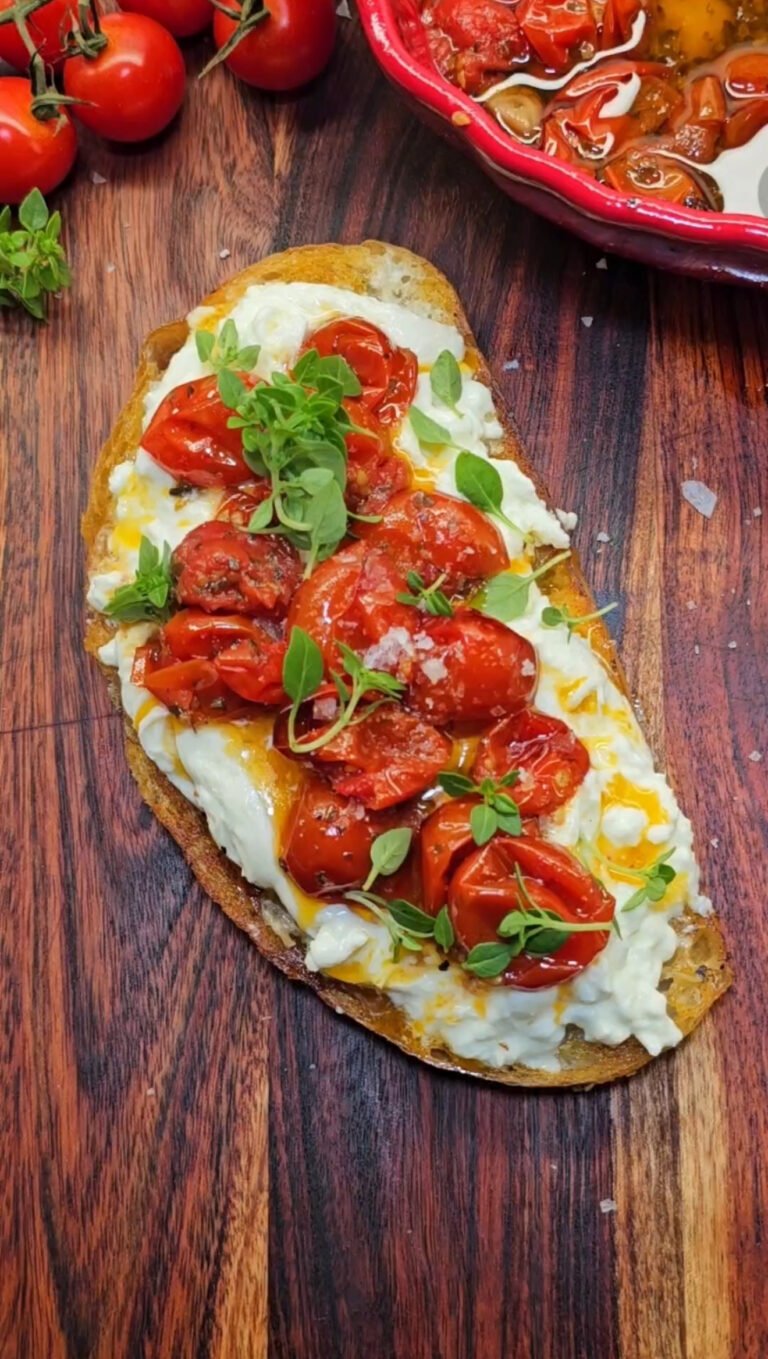
If you’ve made my Garlic & Tomato Confit Burrata Toast, you already know how powerful that contrast of creamy + bright + salty can be. This recipe plays in that same space, just in a slightly more structured, plated way.
What a Timbale Actually Is (And Why You Should Make More of Them)
If you’ve never made a timbale before, don’t let the name intimidate you.
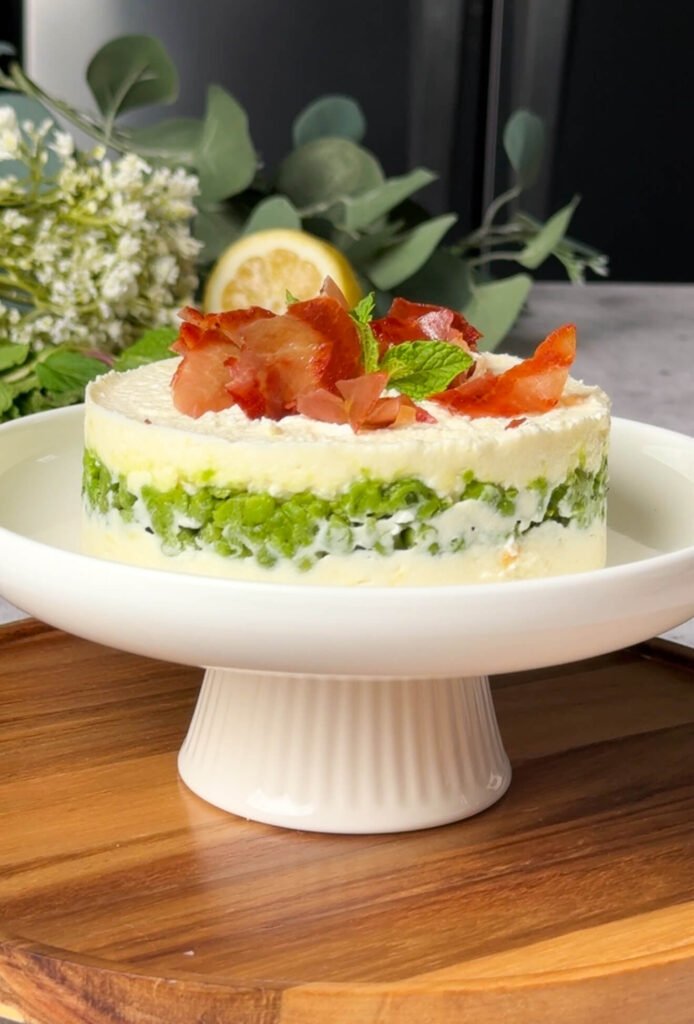
A timbale is simply a layered dish that’s shaped using a mold – usually round – and then gently lifted to reveal clean, structured layers. That’s it.
But visually? It looks like something that came out of a professional kitchen.
This is exactly the kind of presentation I love for entertaining recipes – because it feels elevated, and still stays completely approachable.
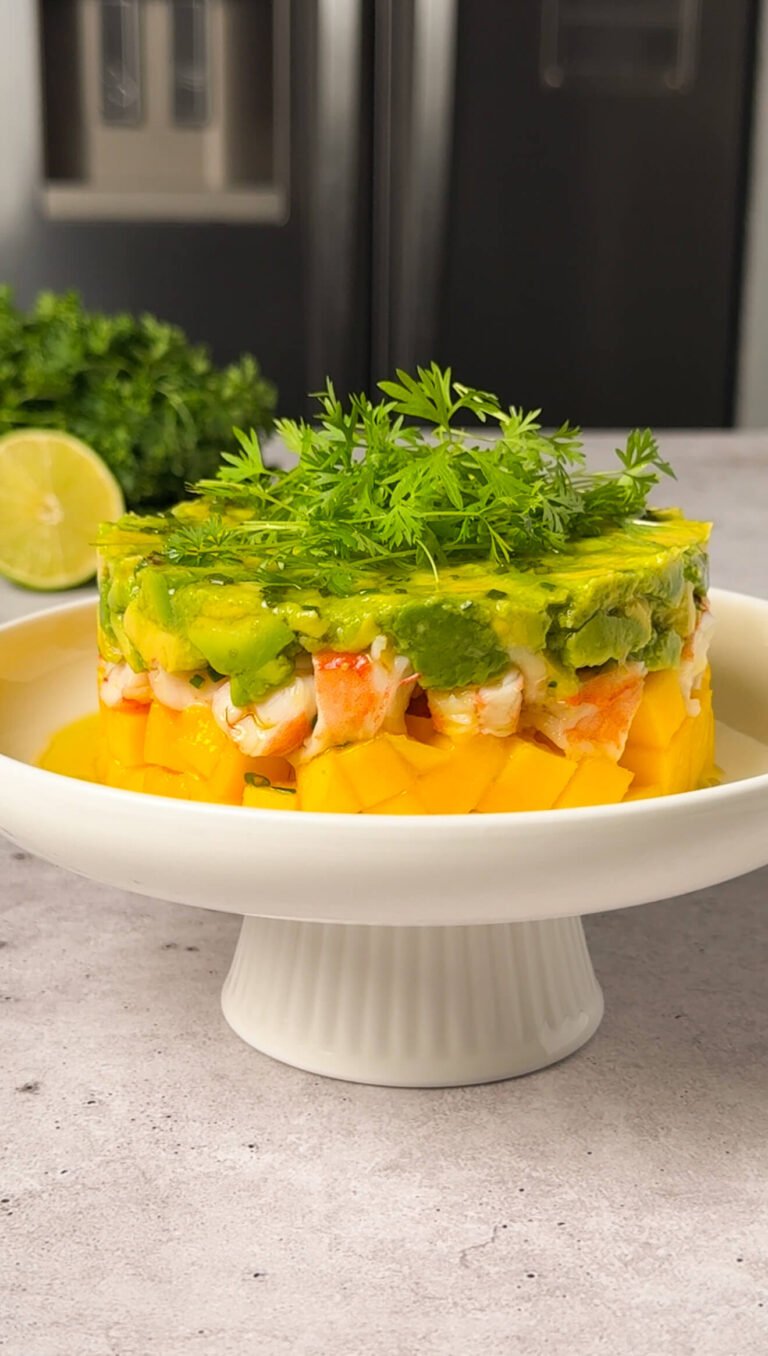
If you’ve made my layered Salmon & Avocado Tartar Stack or any of my molded appetizers before, this will feel very familiar.
Ingredients Breakdown (And Why Each One Matters)
Let’s talk about the ingredients for this ricotta pea timbale, because every single one has a purpose here.
The ricotta is the base of the entire dish, so quality matters. I always go for whole milk ricotta – it’s creamier, richer, and gives that soft, luxurious texture you want.
Cream cheese might seem like a small addition, but it’s doing a lot of work. It stabilizes the ricotta so the timbale holds its shape instead of collapsing when you remove the mold.
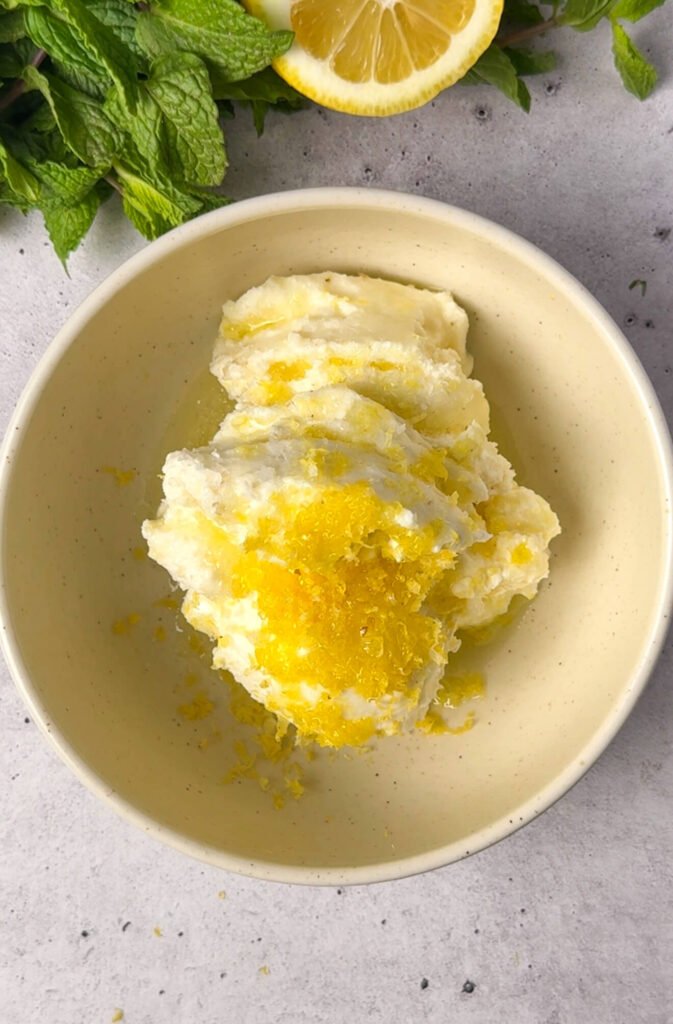
Olive oil adds silkiness and depth, while lemon zest brings brightness without making the mixture watery (this is important – juice would loosen it too much here).
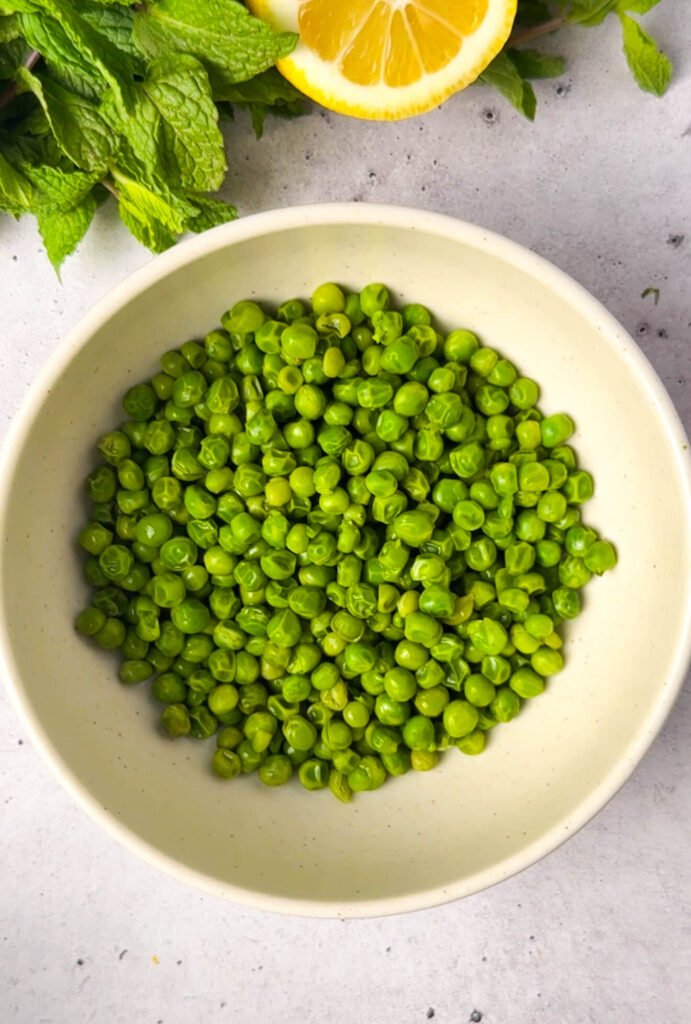
For the pea layer, I love using sweet green peas – fresh when they’re in season, but frozen work beautifully too. Just make sure they’re properly thawed, blanched and cooled.
Mint and lemon juice bring freshness and balance, and together they make the peas taste alive, not dull.
And then the prosciutto… this is your finishing element. It adds texture, salt, and contrast. Don’t skip it!
How to Get That Perfect Texture
The biggest mistake you can make with this recipe is over-processing the peas.
It might be tempting to blend them into a smooth puree, but that completely changes the dish, and not in a good way.
You want the peas to be partially mashed, with some still whole. That contrast is what makes each bite interesting.
The ricotta mixture should be smooth and creamy, but not loose. Think: spreadable, but structured.
If it feels too soft, just add a little more cream cheese and whip again. That one adjustment makes a huge difference when you’re assembling.

Let’s Talk About That Crispy Prosciutto
Crispy prosciutto is one of those small details that instantly makes a dish feel finished.
It takes less than 10 minutes, but it completely transforms the flavor and texture of the final plate.
What you’re looking for is crisp – but not burnt. It should still have a slight richness to it, not taste bitter.
And here’s something important: let it cool completely before breaking it. That’s when it really crisps up.
If you’ve made my prosciutto-based crostini before, you’ve probably noticed this same effect – it gets crunchier as it cools.
How to Assemble a Perfect Timbale
This is where the magic happens – and also where people tend to overthink things.
You don’t need anything fancy. A simple ring mold (about 5 inches) is perfect.
Start with the ricotta layer at the bottom, then add the peas, then finish with another layer of ricotta.
The key is gently pressing each layer as you go. Not aggressively – just enough to keep everything compact and clean.
When you lift the mold, do it slowly and straight up. That’s it!
And suddenly you have this beautiful, structured appetizer that looks like it came out of a restaurant
When to Serve This (Because It Fits More Occasions Than You Think)
This ricotta pea timbale is one of those recipes that adapts to almost anything.
It works as a light lunch, especially if you add a slice of toasted sourdough on the side.
It’s perfect for spring entertaining – Easter, brunch, or even a simple dinner with friends.
And if you’re building out an appetizer spread, this pairs beautifully with things like my burrata-based dishes or even a light crostini. If you’re planning a full spread, I would absolutely link this with something like your burrata toast or a deviled egg variation for contrast in textures and flavors.
If you love prosciutto-based appetizers, Savory Bruschetta Cheesecake Dip with Prosciutto & Sun-Dried Tomatoes is definitely worth a try 🙂
Small Tips That Make a Big Difference
Here are a few things I’ve learned from making this more than once – the kind of details that don’t seem major, but actually are:
- Always cool the peas completely before mixing – warm peas will melt the ricotta layer when assembling
- Use lemon zest in the ricotta, but juice in the peas – this keeps the structure intact
- Don’t skip the olive oil – it ties everything together and enhances flavor
- Press gently, not firmly – too much pressure will flatten the layers
- Assemble just before serving for the cleanest look
Variations You Can Try (Once You Make It Once)
Once you’ve made this version, it becomes a template.
You can swap mint for basil or dill depending on what you have.
You can add a thin layer of lemony arugula for extra freshness.
Or even fold a bit of whipped feta into the ricotta for a slightly saltier version.
If you love recipes like my whipped cheese toasts or layered appetizers, this is a natural extension of that style.
How to Store (If You Somehow Have Leftovers)
This is best served fresh – especially because of the prosciutto.
But if you do have leftovers, store the layers separately if possible. The ricotta and pea mixture will keep well in the fridge for up to 2 days.
Just reassemble when you’re ready to serve again.
Frequently Asked Questions
Can I make this ricotta pea timbale ahead of time?
Yes, but with a small adjustment.
You can prepare both the ricotta mixture and the pea layer up to 24 hours in advance and store them separately in the fridge. However, I recommend assembling the timbale just before serving for the cleanest layers and best texture.
If you assemble it too early, the moisture from the peas can slightly soften the ricotta layers and the structure won’t be as sharp.
Also, always add the crispy prosciutto at the very end so it stays crisp.
Can I use frozen peas instead of fresh?
Absolutely – and I actually use frozen peas most of the time.
Just make sure to:
- thaw them completely
- blanch briefly (if needed)
- cool them down fully before mixing
Good quality frozen peas are naturally sweet and work beautifully in this recipe.
What can I use instead of prosciutto?
If you don’t eat prosciutto or want a variation, you still want something that brings salt and crunch.
A few easy swaps that work well:
- crispy pancetta
- toasted nuts (like pistachios or pine nuts)
- crispy bacon
- even a sprinkle of flaky salt + olive oil if keeping it vegetarian
That contrast is important, so I wouldn’t skip it entirely.
Do I need a ring mold to make a timbale?
A ring mold makes it much easier to get that clean, professional look, but you can improvise.
You can use:
- a small bowl lined with plastic wrap (then invert)
- a measuring cup
- even a clean, empty can with both ends removed
The shape might not be quite as sharp, but it will still taste exactly the same.
Why is my ricotta mixture too soft?
This usually comes down to the ricotta itself.
Some brands are naturally more watery. If your mixture feels too loose:
- add a little more cream cheese
- or strain the ricotta before using
You’re looking for a texture that is creamy but holds its shape, not runny.
Can I blend the pea mixture instead of mashing?
I wouldn’t recommend it for this recipe.
Blending turns it into a puree, which removes the texture contrast that makes this dish interesting. The slight chunkiness – with some whole peas – is what gives each bite structure and balance.
What herbs can I use instead of mint?
Mint gives this dish that fresh, springy flavor, but you can absolutely switch it up.
Good alternatives include:
- basil (a softer, slightly sweeter flavor)
- dill (more savory and slightly tangy)
- chives (mild and oniony)
Each one will shift the flavor slightly, but all work beautifully with ricotta and peas.
How long does it last in the fridge?
If stored properly, the components will last up to 2 days in the fridge.
For best results:
- store ricotta and pea mixture separately
- assemble fresh when ready to serve
Once assembled, it’s best enjoyed the same day.
Can I scale this recipe for a party?
Yes, and this is actually a great entertaining recipe!
You can either:
- make one large timbale
- or create individual mini timbales using smaller molds
Mini versions are especially beautiful for appetizers and feel very “restaurant-style” when served individually.
What should I serve with this?
This ricotta pea timbale pairs really well with something crunchy on the side.
I usually serve it with:
- toasted sourdough
- crostini
- or even seeded crackers
If you’re building a full spread, it works beautifully alongside other light, elegant appetizers – especially anything with burrata, tomatoes, or smoked salmon.
Final Thoughts
This ricotta pea timbale is one of those recipes that feels like a small moment.
It’s simple, but it looks beautiful. It’s quick, but it feels intentional.
And those are the recipes I keep coming back to – the ones that don’t require a full production, but still make everything feel a little more special.
If you make it, you’ll see exactly what I mean!

Ricotta & Spring Pea Timbale with Crispy Prosciutto
Ingredients
Method
- Preheat oven to 375°F.
- Place prosciutto slices flat on a parchment-lined baking sheet.
- Bake for 5–10 minutes until crisp (watch closely to avoid burning).
- Remove from oven, let cool completely, then crumble into small pieces.
- In a bowl, combine ricotta, softened cream cheese, olive oil, lemon zest, and salt.
- Whip or mix until smooth and creamy.
- The texture should be thick and spreadable, not runny.
- Lightly mash the peas with a fork, leaving some whole for texture.
- Mix in olive oil, lemon juice, chopped mint, and salt.
- Do not puree — texture is key.
- Using a 5-inch ring mold, layer in this order:
- Ricotta (base layer)
- Pea mixture
- Ricotta (top layer)
- Gently press each layer to keep edges clean and compact.
- Carefully lift the mold straight up.
- Top with crispy prosciutto and garnish with fresh mint or microgreens.
- Serve immediately for best texture.
Notes
- Use whole milk ricotta for the creamiest texture
- If ricotta is watery, strain it before mixing
- Let peas cool completely before assembling
- Add prosciutto just before serving to keep it crisp
- For cleaner layers, lightly press each layer as you build