
This No Flour, No Yeast Gluten-Free Fitness Bread is everything you want in a healthy homemade loaf – soft inside, golden outside, and full of wholesome ingredients like cottage cheese, oats, and seeds. It’s gluten-free, high in protein, and incredibly easy to make – no yeast, no kneading, no fuss. Perfect for cozy mornings, this bread is meant for toasting – enjoy it with scrambled eggs, creamy avocado, smoked salmon, or simply a smear of good butter. Hearty, nourishing, and naturally gluten-free, it’s the kind of bread that feels like a treat while keeping your day balanced and energized.
There’s something incredibly comforting about homemade bread – the smell alone can transform your whole kitchen into the coziest place on earth. That warm, golden aroma drifting from the oven feels like a little moment of calm, and this No Flour, No Yeast Gluten-Free Fitness Bread captures exactly that feeling – wholesome, simple, and nourishing.
It’s the kind of bread that makes you feel good about what you’re eating, but without sacrificing any of the joy that comes with it. There’s no flour, no yeast, no long waiting for dough to rise – just real ingredients, mixed together in one bowl, shaped with your hands, and baked into a gorgeous, rustic loaf that looks straight out of a countryside bakery.
I started making this bread because I wanted something real – something I could slice, toast, and enjoy with eggs in the morning or a smear of butter in the afternoon, without feeling heavy or guilty. It’s the perfect balance of cozy comfort and healthy fuel – hearty enough to keep you satisfied, but light enough to enjoy every day.
What Makes This Bread So Special
Most gluten-free breads rely on a long ingredient list or expensive flour blends. This one? Seven ingredients. That’s it. And they all work together beautifully to create a soft, flavorful loaf that’s naturally high in protein, rich in fiber, and free from refined flour or yeast.
The secret is in the trio of cottage cheese, oats, and eggs – a combination that gives the bread structure, moisture, and protein, without needing any of the traditional ingredients.
- Cottage cheese keeps the loaf soft and adds creamy richness. It’s what makes the crumb tender instead of dry or crumbly.
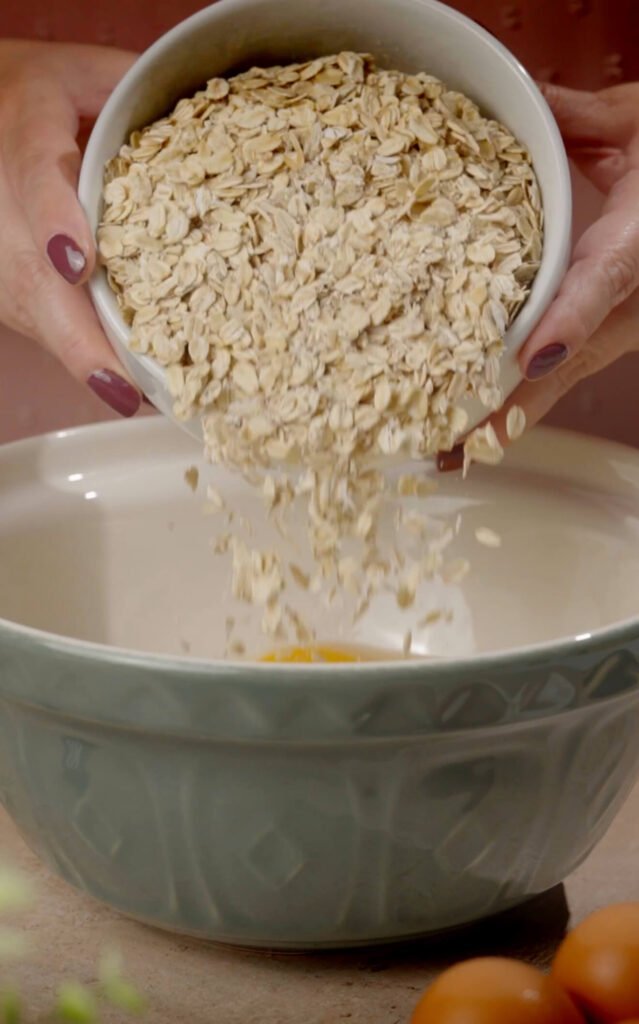
- Oats replace traditional flour, adding a rustic, nutty flavor and plenty of fiber.
- Eggs bind it all together, helping the loaf rise just enough while keeping it cohesive and sliceable.
Add in flax seeds, sunflower seeds, and pumpkin seeds for crunch, plus a touch of Italian herbs for aroma, and you have a bread that tastes as wholesome as it looks. It’s hearty, golden, and just slightly chewy – perfect for toasting.
Ingredients You’ll Need
The ingredients are simple, clean, and easy to find – no fancy gluten-free flours or gums required.
- 1 lb cottage cheese – I recommend full-fat or 2% for the best texture and richness.
- 10.5 oz old-fashioned oats – These act as your “flour.” Make sure they’re labeled gluten-free if needed.
- 3 eggs – The binding element that holds everything together.
- ½ tsp baking soda – Adds a bit of lift and keeps the loaf from being too dense.
- ½ tsp salt – Enhances flavor and balances the sweetness of oats.
- 1 tsp Italian herbs – I love using oregano, basil, and thyme, but you can play around with your favorite blend.
- 2 oz each of flax seeds, sunflower seeds, and pumpkin seeds – For crunch, nutrition, and a beautiful speckled look.
That’s all you need to make a wholesome loaf that’s full of texture, flavor, and goodness.
How to Make It (Step-by-Step)
This is one of the easiest breads you’ll ever make – no mixer, no kneading, and no pan required.
- Preheat your oven to 360°F (180°C). Line a baking tray with parchment paper.
- Combine all ingredients in a large bowl. Use a spoon or your hands to mix everything together – no need for a food processor. The mixture should be thick and slightly sticky but moldable.
- Shape the loaf: Transfer the mixture onto the parchment paper and shape it into an oval loaf with your hands. It doesn’t have to be perfect – that rustic look is part of its charm!
- Bake for about 60 minutes, or until a toothpick inserted in the center comes out clean and dry. The outside should be beautifully golden.
- Cool completely before slicing. This step is essential – it helps the loaf set and develop its structure.
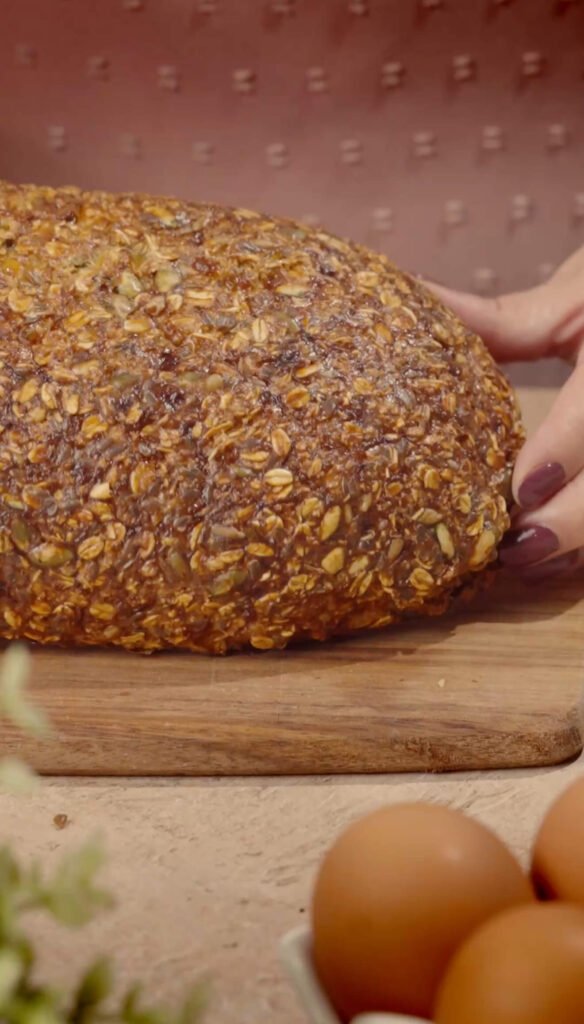
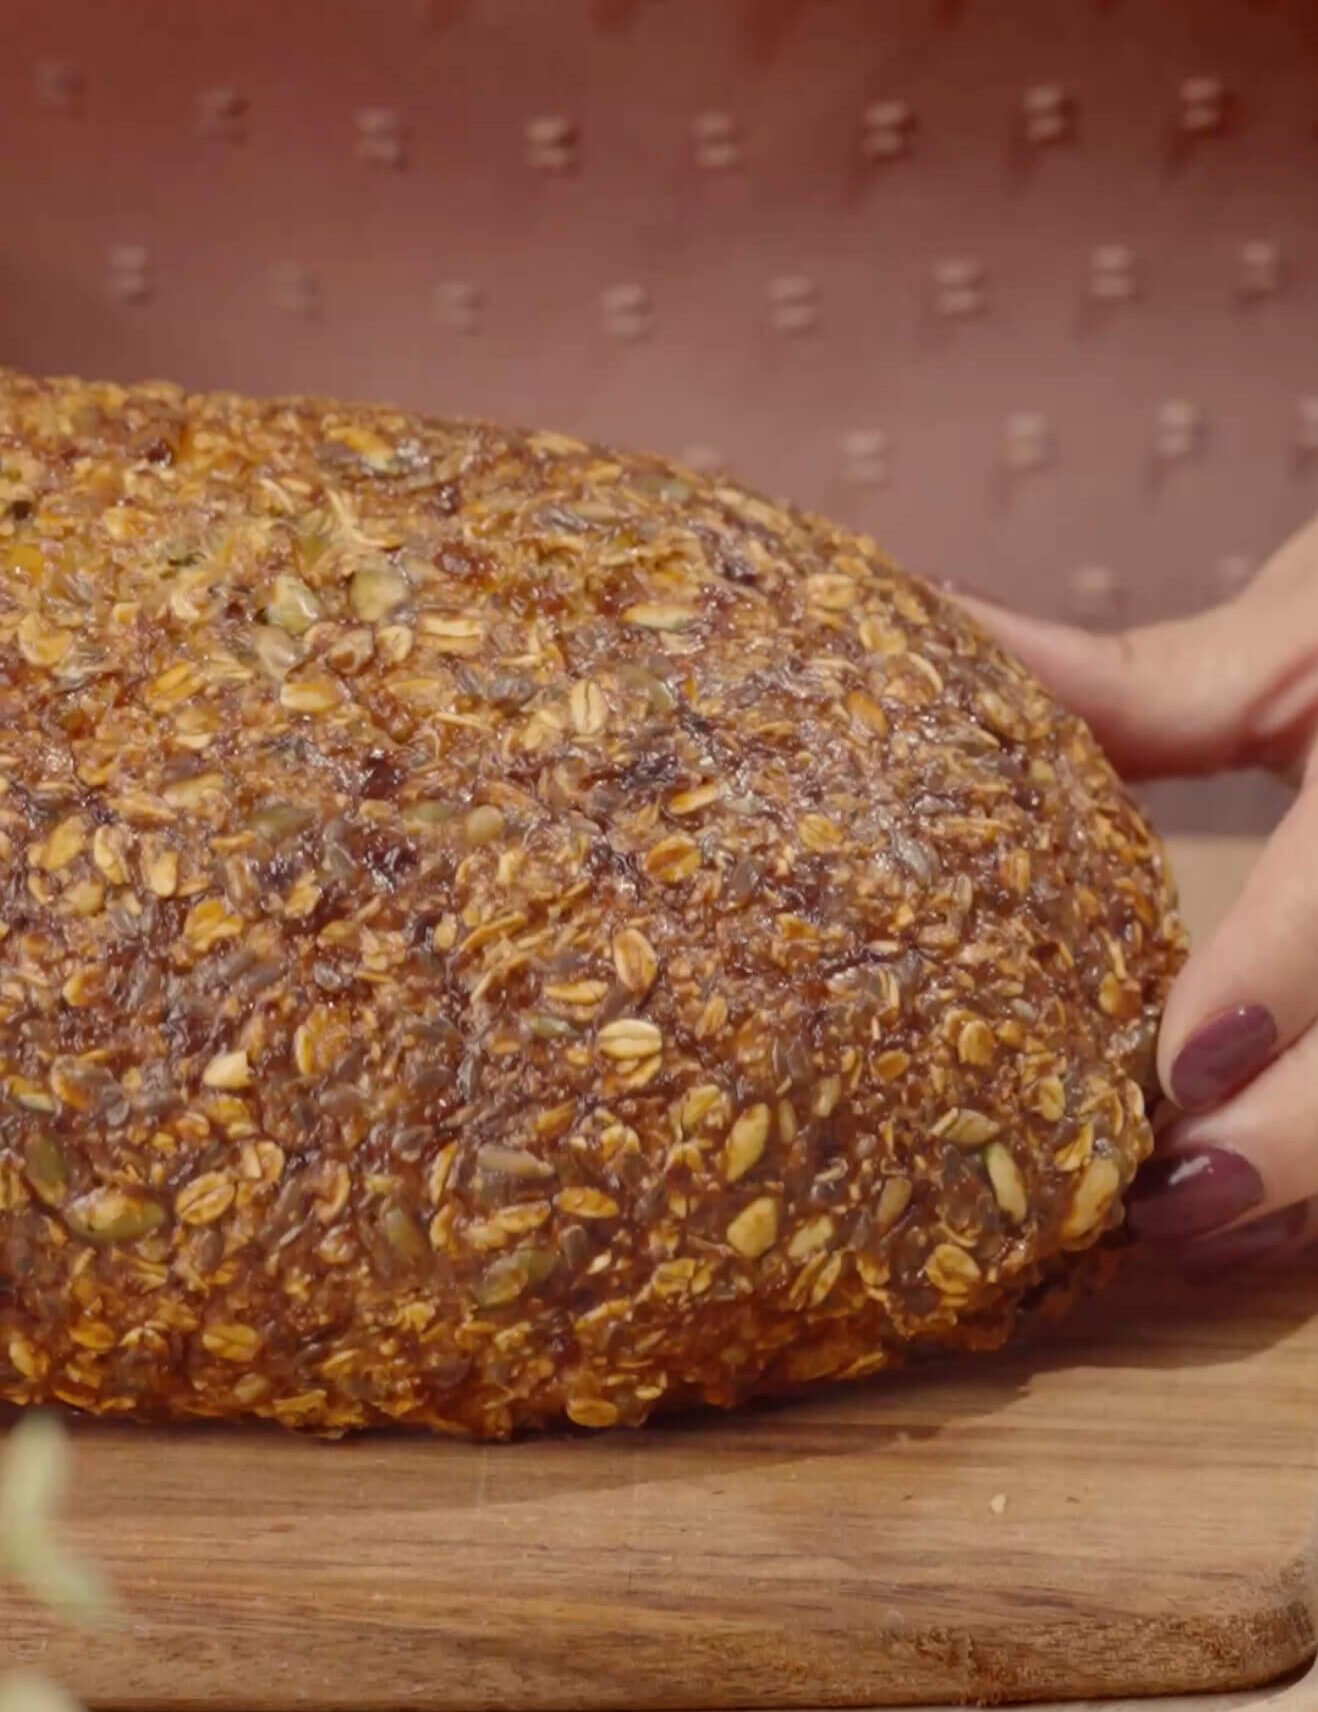
That’s it! A beautiful, hand-shaped loaf that looks like something straight from an artisan bakery – but made entirely from healthy, real ingredients.
The Texture: Rustic, Nutty, and Perfectly Toastable
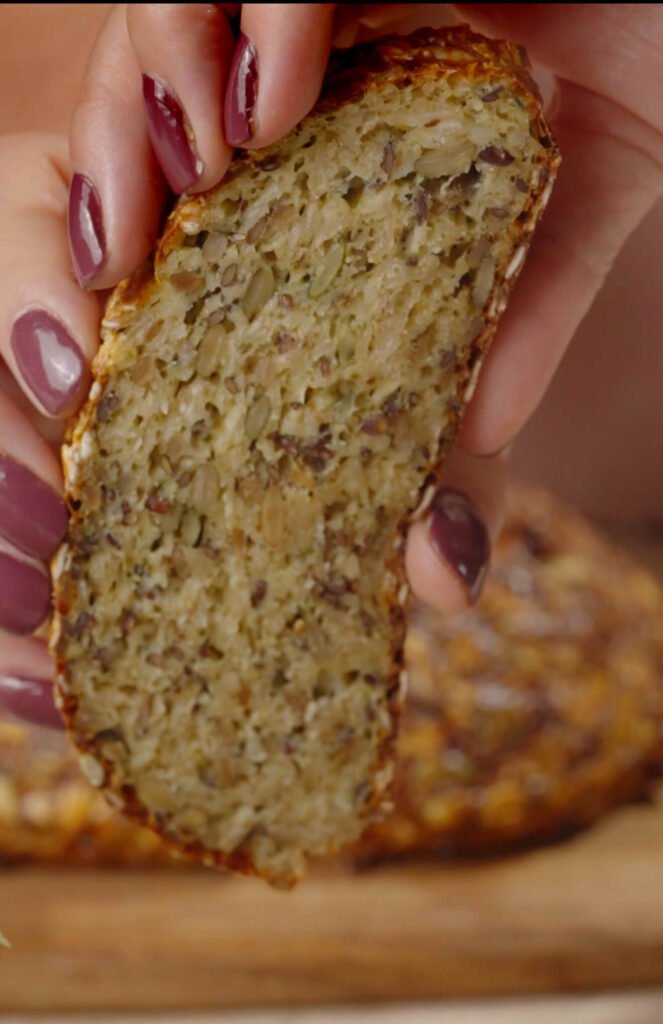
This bread has that wholesome, seed-studded texture that makes every bite interesting. The crust turns golden and slightly crisp, while the inside stays soft, moist, and full of little pockets of oats and seeds.
Because there’s no yeast or flour, it won’t have that airy, fluffy texture of a sandwich loaf – instead, think hearty, grounding, and full of character. It holds up beautifully when sliced and toasted, developing that satisfying crunch that pairs so well with butter, eggs, or avocado.
The best way to enjoy it? Toasted until golden, still warm, and topped with something simple and fresh.
Why It’s the Ultimate Balanced Breakfast Bread
Most “healthy” breads are either too dense, too dry, or just plain boring. This one manages to be everything at once – nutritious, filling, and actually delicious.
Each slice gives you:
- High protein from cottage cheese and eggs
- Healthy fats from seeds
- Fiber from oats and flax
- Zero gluten or refined flour
It’s perfect for anyone looking to eat cleaner without giving up that cozy, bread-loving part of life. You get all the satisfaction of homemade bread with none of the heavy feeling afterward.
My Favorite Ways to Serve It
This bread isn’t made for tall sandwiches – it’s a toast kind of bread, meant to be savored with your favorite toppings.
Here are a few ways I love to serve it:
- Simple and classic: A warm slice with a pat of salted butter – sometimes that’s all you need.
- Breakfast perfection: Topped with soft scrambled eggs and fresh chives.
- Smoked salmon moment: With a layer of cream cheese, smoked salmon, and a sprinkle of dill.
- Chicken or tuna salad toast: Creamy, flavorful toppings pair beautifully with the nutty crunch of the loaf.
- Avocado toast (of course): Mashed avocado, lemon juice, chili flakes, and everything bagel seasoning.
You can also try sweet versions – cottage cheese with honey and berries, or almond butter and banana slices. This loaf really goes with everything.
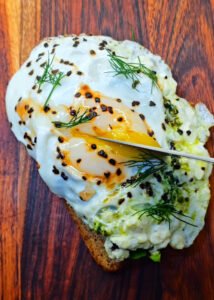
Look at this gorgeous toast where I am using this bread! (HERE IS THE RECIPE)

Tips for the Best Results
Even though this bread is practically foolproof, a few small things can make it truly perfect:
- Mix by hand or with a spoon. The mixture should stay a little textured – overmixing can make it too dense.
- Shape firmly but gently. Press it together into an oval loaf with your hands. It should hold its shape easily.
- Bake on parchment. It prevents sticking and helps the crust crisp up evenly.
- Cool completely before slicing. This helps it set and slice neatly.
- Toast before serving. It brings out the best flavor and texture every single time.
Storage Tips
This bread keeps really well, making it perfect for meal prep or weekly breakfasts.
- Room temperature: Store in an airtight container for up to 2 days.
- Refrigerate: Keeps for about a week. Toast slices before serving for the best flavor.
- Freeze: Slice the loaf, separate slices with parchment, and freeze. Toast straight from frozen – it tastes freshly baked.
Why You’ll Fall in Love with It
This no flour gluten-free fitness bread feels different from typical “healthy” recipes because it’s so real – wholesome, rustic, and homemade in the best way. There’s something grounding about shaping a loaf with your hands and baking it without any fancy equipment or store-bought flour blends.
It’s the kind of bread you’ll want to make on a Sunday morning – maybe with music playing and sunlight coming through the window – because it’s not just about eating well, it’s about slowing down and enjoying the process.
And the best part? Every slice feels like a small act of self-care.
Fun Variations
You can easily make this bread your own by switching up the flavors:
- Herb & Garlic: Add a pinch of garlic powder or minced fresh herbs.
- Cheesy version: Mix in a bit of shredded mozzarella or Parmesan for richness.
- Sweet breakfast loaf: Omit the herbs and add cinnamon, vanilla, and a drizzle of honey.
- Seed medley: Swap pumpkin seeds for chia or hemp hearts for an extra nutritional boost.
Each variation keeps that hearty texture but gives it a new twist depending on your mood or meal.
The Kateryna’s Café Touch
You know I’m all about recipes that look just as beautiful as they taste. When this bread comes out of the oven – golden, crackly, and rustic – it’s absolutely stunning on a breakfast board. Slice it thick and serve it next to soft eggs, avocado, or a little smoked salmon. Add a drizzle of olive oil and a sprinkle of sea salt, and you’ve got a simple, elegant meal that feels straight from a café brunch table.
It’s everyday food that feels special – the kind of thing that makes even an ordinary morning feel like a treat.
Final Thoughts
This No-Flour, No-Yeast Gluten-Free Fitness Bread is everything I love about homemade food – simple, nourishing, and full of heart. You don’t need to be a baker to make it, and yet it looks and tastes like something you’d be proud to share.
It’s proof that healthy eating can be beautiful, comforting, and satisfying all at once. Whether you enjoy it toasted with butter, topped with eggs, or as part of your weekend brunch, it’s a recipe that will keep you coming back again and again.
Hand-shaped, rustic, golden, and full of good-for-you ingredients – this bread is a true kitchen staple that fits seamlessly into balanced, joyful living.
No Flour, No Yeast Gluten-Free Fitness Bread
Ingredients
Method
- Preheat the oven to 360°F (180°C). Line a baking sheet with parchment paper.
- In a large bowl, combine all ingredients. Stir with a spoon or use your hands until everything is evenly mixed.
- Shape the mixture into a rustic oval loaf and place it on the prepared baking sheet.
- Bake for about 60 minutes, or until a toothpick inserted in the center comes out clean and dry.
- Cool completely before slicing – this step ensures the loaf sets and slices neatly.
Video
Notes
- Don’t overmix – a spoon or your hands are perfect for combining the ingredients while keeping texture intact.
- Let the loaf rest for at least an hour before slicing for the best crumb.
- Toast before serving to bring out that nutty aroma and crisp edges.
- Store in an airtight container up to 2 days, refrigerate up to a week, or freeze slices for easy breakfasts.


It tastes delicious but my. Read turned out REALLY FLAT. Wondering what I did wrong
Hi Kim, were you able to shape the “dough” into a loaf?
Due to anaphylactic egg allergy, do you think there a possibility of an egg substitute (flax/chia or chickpea flour or gelatine) working? This bread looks really good, but I understand 3 eggs is a lot to replace 🤔
Hi Donna. I have not tried this recipe without regular eggs, but my best bet would be flax eggs.