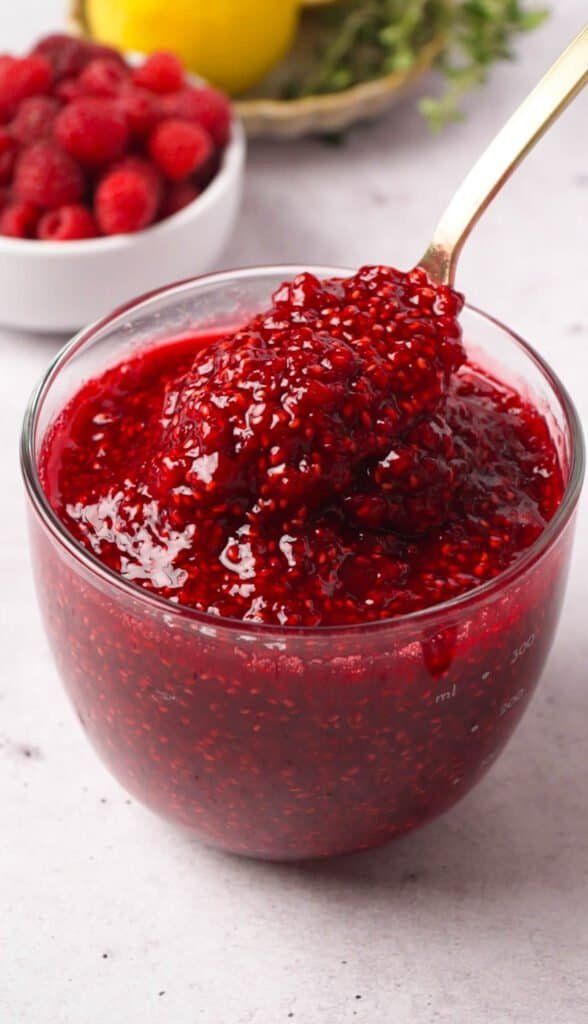
A soft, spoonable raspberry vanilla preserve made in one pot with no pectin and no canning required. Just raspberries, lemon, vanilla, and a pinch of salt, simmered until thick and glossy. Ready in about 25 minutes and made to live in your fridge, not your pantry.
I made this for the first time a while ago when I had a flat of raspberries going soft faster than I could eat them, and no real plan beyond using them up before they turned. One pot, a wooden spoon, fifteen minutes of half-watching the stove while I did something else. By the time it had thickened, I’d already eaten two spoonfuls straight out of the pan, which is usually how I know a recipe is worth writing down.
This isn’t a canning recipe, and I want to be upfront about that because most of what comes up when you search for raspberry preserves assumes you’re trying to fill a pantry shelf for the next year. I’m not. I wanted one good jar, made fast, with nothing in it I couldn’t pronounce. Raspberries, sugar, a little lemon, a little vanilla, salt. Cooked down until it’s soft and glossy rather than stiff, the kind of texture that slumps a bit when you tip the jar instead of holding a sharp edge like a firmer set jam.
The vanilla is the part people always ask about. It’s a small addition, but it changes the whole character of the preserve, taking the edge off the tartness without making it taste like dessert. It’s become one of those things I keep a jar of in the fridge more often than not, because it goes into so many different places.
Why This One’s Worth Making
It comes together in under thirty minutes with no pectin, no candy thermometer, and no canning setup. The texture is softer and more spoonable than a typical firm jam, which I actually prefer for the way it works in so many different recipes. And because it makes just over a cup, it’s sized for actually using it up rather than letting half a dozen jars sit in the back of the fridge.
What You’ll Need, and Why
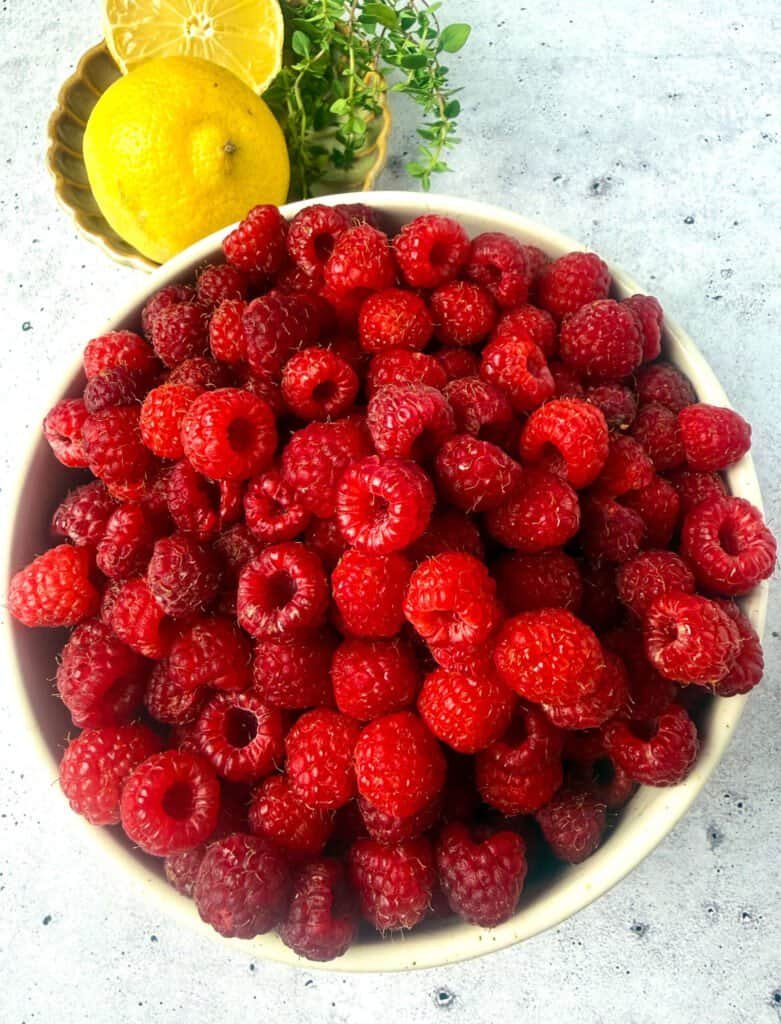
Fresh raspberries. Four cups. Fresh berries give you a brighter color and cleaner flavor than frozen, which tend to release more water as they cook. Frozen will work if that’s what you have, just expect a few extra minutes of simmering to cook off the additional liquid.
Granulated sugar. Two-thirds of a cup is less than most jam recipes call for, and that’s intentional. Raspberries carry natural pectin in their seeds and skin, so the sugar here is mostly helping the fruit break down rather than doing all the thickening work on its own.
Lemon juice. Not optional, even though it’s just a teaspoon. The acid brightens the flavor and helps the natural pectin set properly, which matters more in a no-pectin recipe than people usually expect.
Vanilla extract. Use a decent one if you have it; it’s a small amount but it’s doing real work in such a short ingredient list. A scraped vanilla bean works too if you want a more pronounced flavor with visible flecks running through the preserve.
Kosher salt. Just a pinch, but skip it and the preserve tastes flatter than you’d think. Salt sharpens fruit flavor in a way sugar can’t on its own.
How to Make It
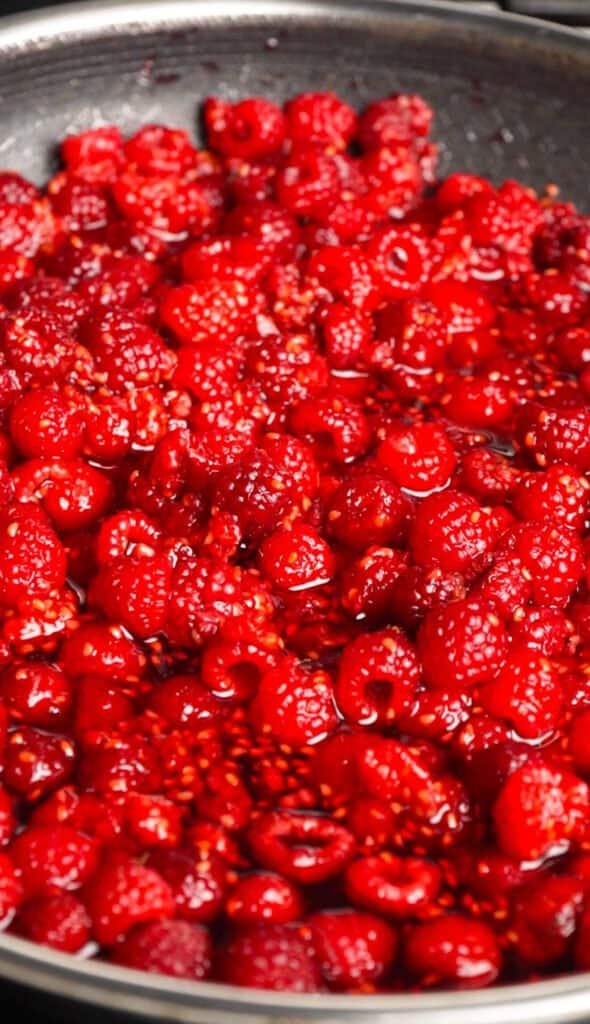
Combine the raspberries, sugar, lemon juice, vanilla, and salt in a medium saucepan and stir just enough to distribute the sugar. Bring it to a gentle simmer over medium heat, looking for small, steady bubbles rather than a hard boil. Let it cook for fifteen to twenty minutes, stirring every few minutes so nothing catches on the bottom of the pan.
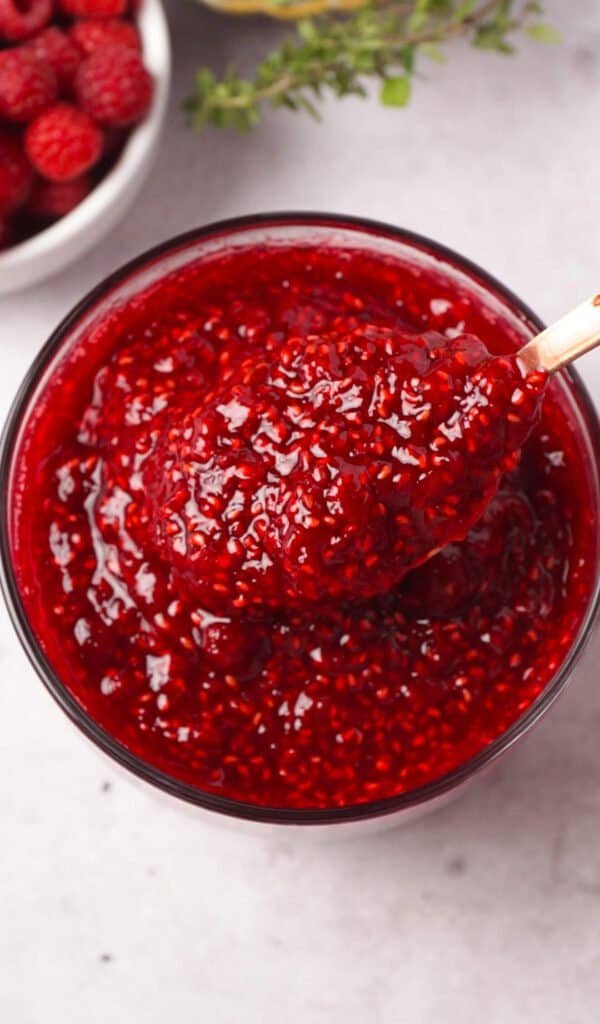
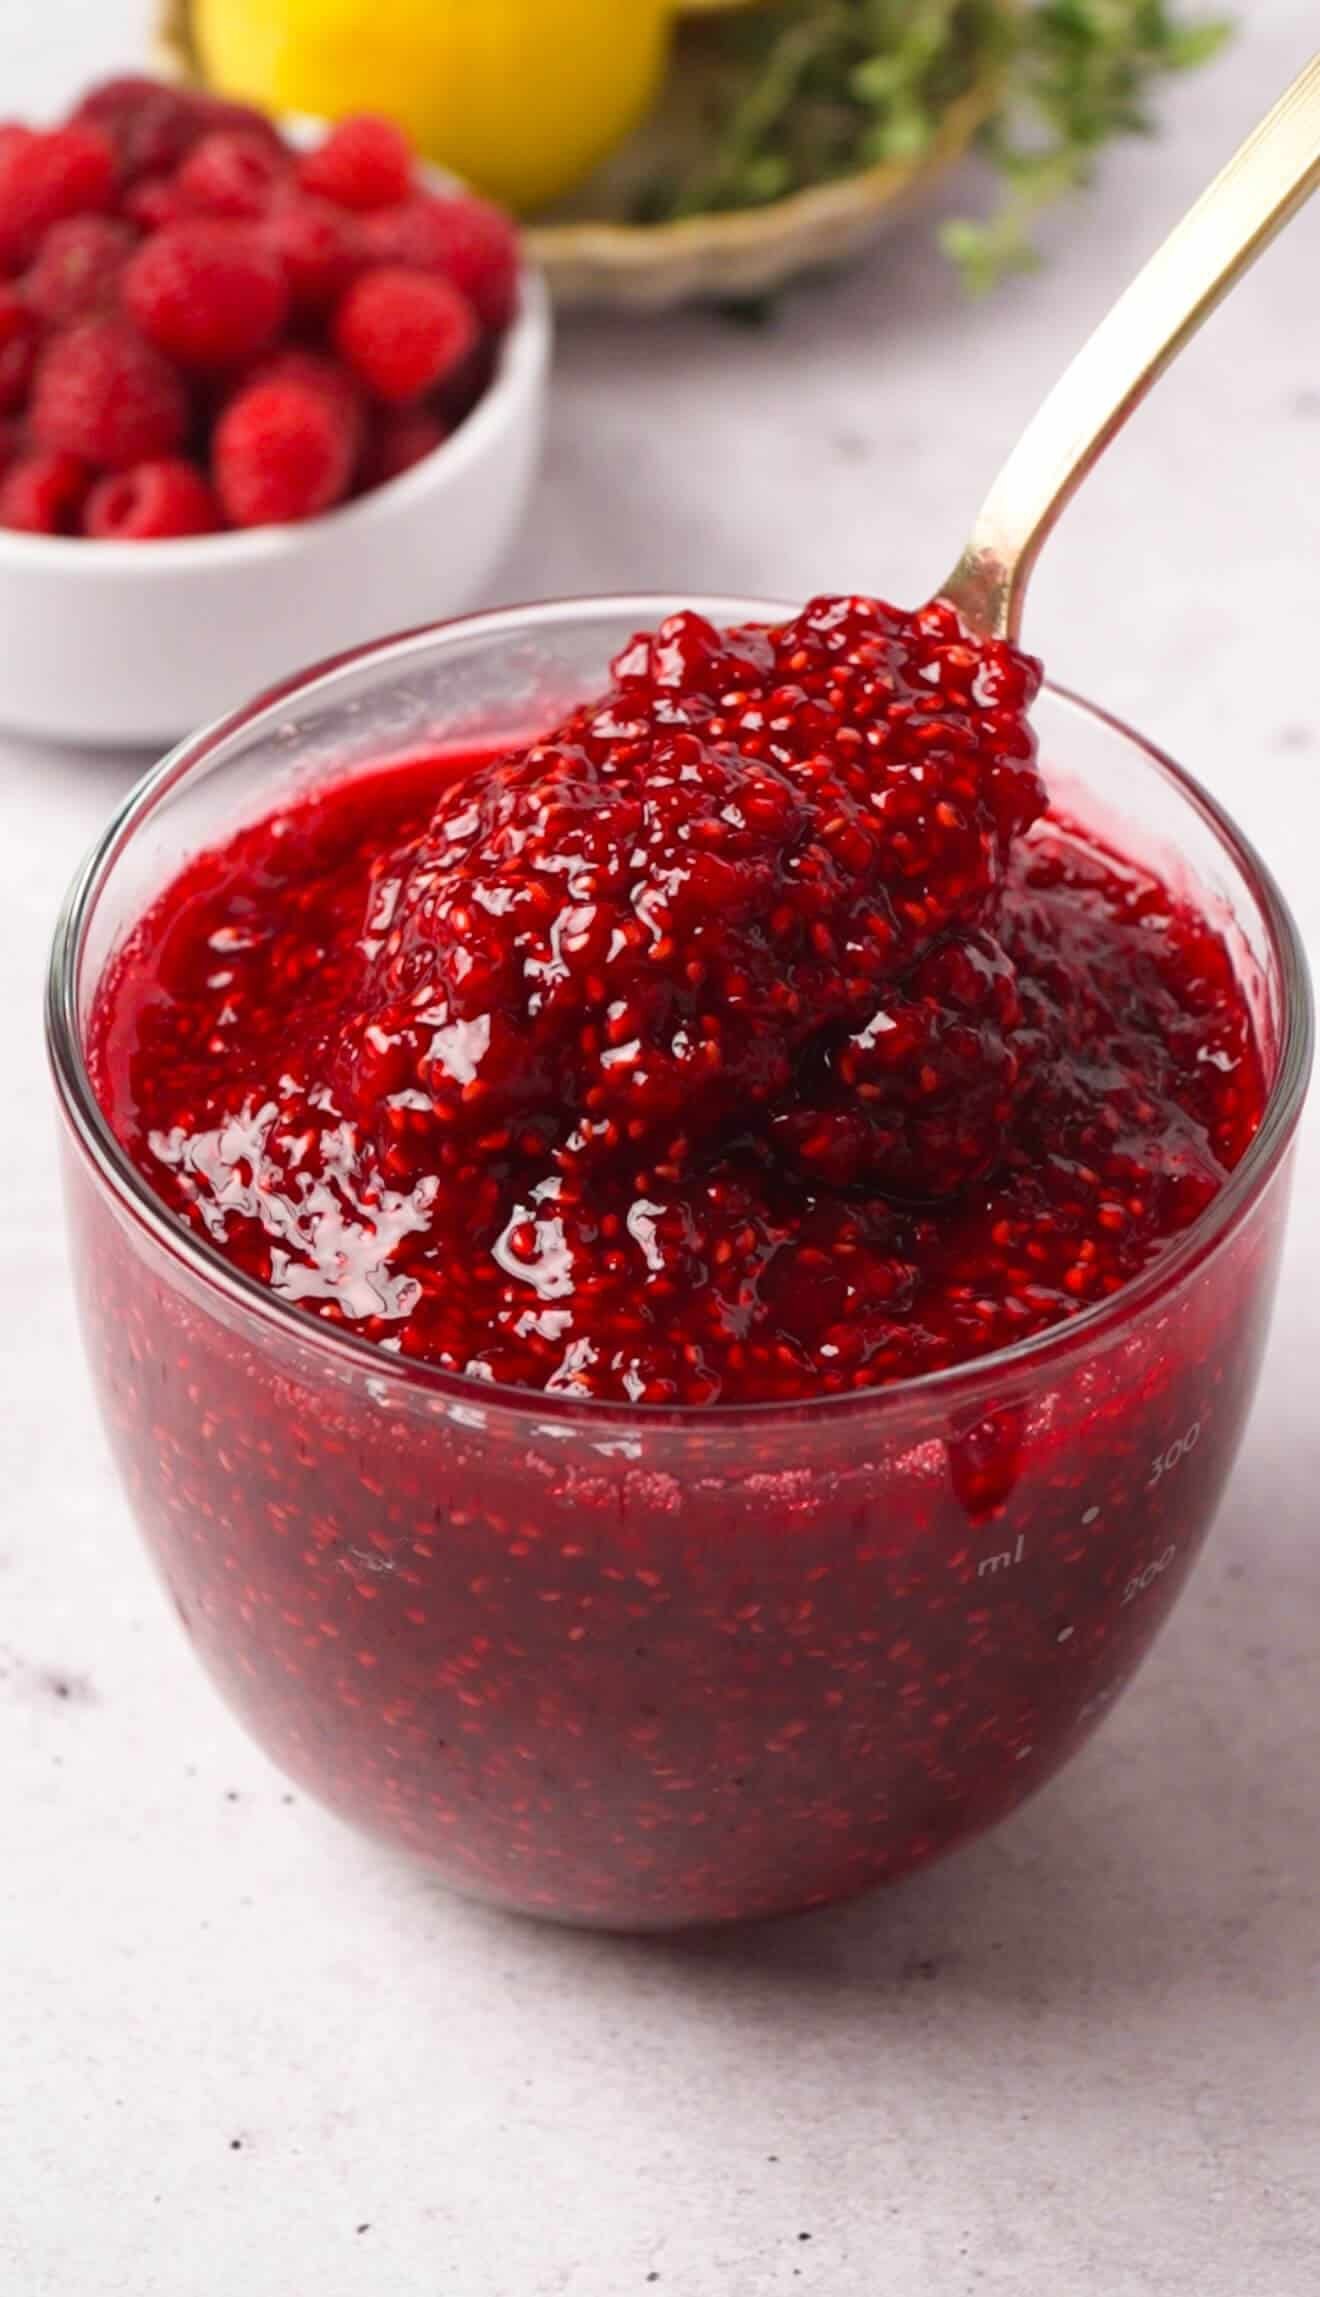
You’ll notice the mixture loosen before it thickens, then slowly deepen in color and reduce as the water cooks off. It’s ready when a spoonful holds its shape for a second before settling back into the pot, rather than running off the spoon right away. If you’re not sure, drag your spoon across the bottom of the pan; the trail should stay visible for a moment before the preserve flows back into it.
Pull it off the heat and let it cool before transferring to a jar. It’ll continue to thicken slightly as it cools, so don’t worry if it still looks a touch loose right off the stove.
A couple of things to watch for: if it seems to be cooking unevenly or catching on one side, lower the heat and stir more often instead of walking away. And if you’re between “ready” and “needs a bit more time,” give it the extra two or three minutes. An underdone preserve still tastes fine, it just won’t hold its texture once it’s cold.

Storage and Make-Ahead
This keeps well in an airtight jar in the fridge for about two weeks, though it rarely lasts that long around here. It also freezes nicely for up to three months if you want to make a double batch and stash some away; just thaw it overnight in the fridge and give it a stir before using, since the texture can separate slightly. If you’re making this ahead for a specific occasion, it actually tastes better after a day in the fridge once the flavors have had time to settle.
A Few Ways I Use It
This isn’t a one-trick jar. I’ve stirred it into a bowl of thick Greek yogurt for breakfast, swirled it through cottage cheese, and spooned it over warm oatmeal more mornings than I can count.
If you like the format of this recipe, my small batch dark cherry jam with red wine and thyme follows the same basic method but leans savory and a little more wintery, which makes the two a nice pair to have on hand depending on the season.
Frequently Asked Questions
What’s the difference between jam and preserves? Jam is usually cooked down until smooth and fully broken apart, while preserves keep more of the fruit’s shape and texture. This recipe sits closer to the preserve side, since the raspberries hold some structure rather than turning into a completely smooth puree.
Why didn’t my preserve thicken? It probably just needs more time on the stove. Since this relies on the raspberries’ natural pectin instead of added pectin, the thickening happens gradually as the water cooks off, so it’s worth being patient rather than turning up the heat. It will also continue to thicken a bit more as it cools.
Can I use frozen raspberries? Yes. They release more liquid as they thaw and cook, so the simmering time will run a few minutes longer to reach the same texture.
Do I need to can this? No, this one’s meant to live in your fridge, not your pantry. If you want a shelf-stable version, you’ll need to follow a tested canning-specific recipe and processing method instead of this one.
Can I double the recipe? Yes, but I’d cook it in a wider pan rather than just doubling everything in the same saucepan, since more fruit needs more surface area to reduce evenly. It’ll also take a bit longer to thicken.
Can I freeze it? Yes, it freezes well for up to three months in an airtight container. Thaw overnight in the fridge and stir before serving.
Small Batch Raspberry Vanilla Preserve
Ingredients
Method
- Add the raspberries, sugar, lemon juice, vanilla extract, and salt to a medium saucepan. Stir gently to distribute the sugar.
- Bring to a gentle simmer over medium heat, watching for small, steady bubbles around the edges of the pot rather than a hard boil.
- Cook for 15 to 20 minutes, stirring occasionally to prevent sticking, until the mixture deepens in color and reduces.
- Continue cooking until the preserve reaches a spoonable consistency, where a spoonful holds its shape for a second before slowly settling back into the pot.
- Remove from heat and let cool to room temperature before transferring to a jar.
Notes
- The preserve will continue to thicken slightly as it cools, so don’t worry if it looks a touch loose right off the stove.
- Store in an airtight container in the refrigerator for up to two weeks, or freeze for up to three months.
- This recipe is designed as a fridge-only small batch preserve, not for shelf-stable canning.