
I love bread. But I love it even more when it comes together with almost no effort. This pesto pull apart bread starts with frozen dinner rolls, so all the hard work is already done for you.
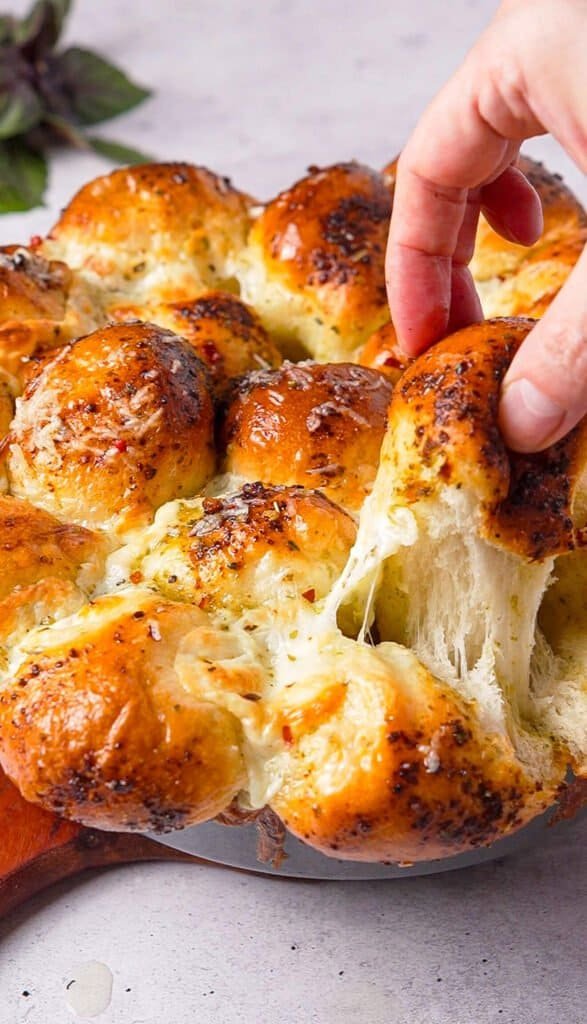
I love bread. But even more, I love good bread, the kind that disappears off the tray before you’ve even finished setting the table. This pesto pull apart bread is exactly that, and the secret is one you’re going to feel a little smug about once you know it. There’s no kneading, no proofing schedule to plan your afternoon around, no rolling anything into perfect little balls by hand. You start with store-bought frozen dinner rolls, the kind sold in every grocery store freezer aisle, and let the dough do the work while you do almost nothing at all.
The whole method comes down to one move: toss the frozen dough balls straight into a bowl with pesto, thinned just slightly with olive oil, then layer them into a cast iron skillet with pockets of mozzarella tucked between. Cover it, let it thaw and rise, and bake. That’s genuinely the entire recipe. No cutting the rolls in half. No rerolling them into smaller pieces the way a lot of pesto pull apart bread recipes ask you to do. Just frozen dough, good pesto, and cheese, going straight into the pan they’ll bake in.
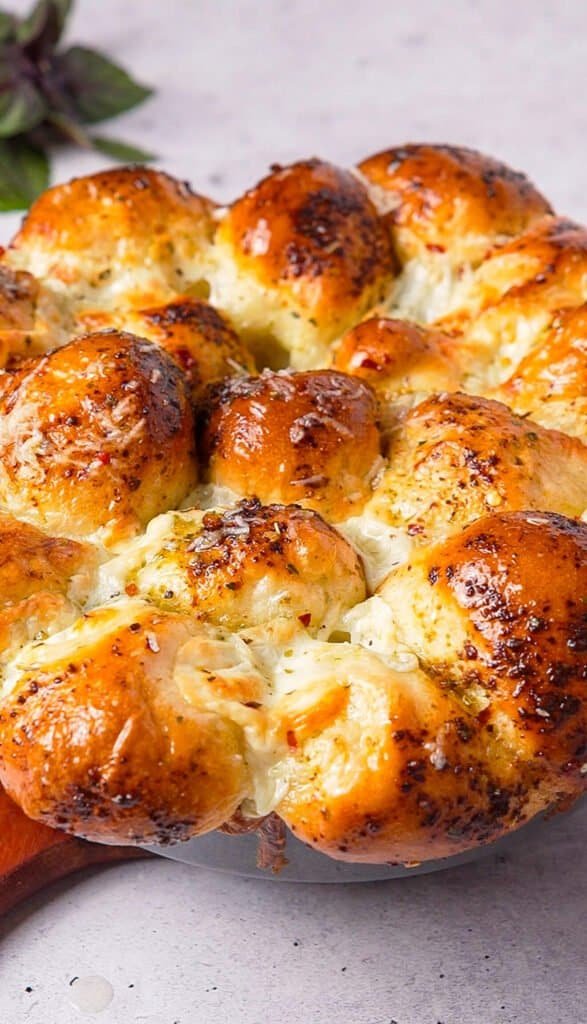
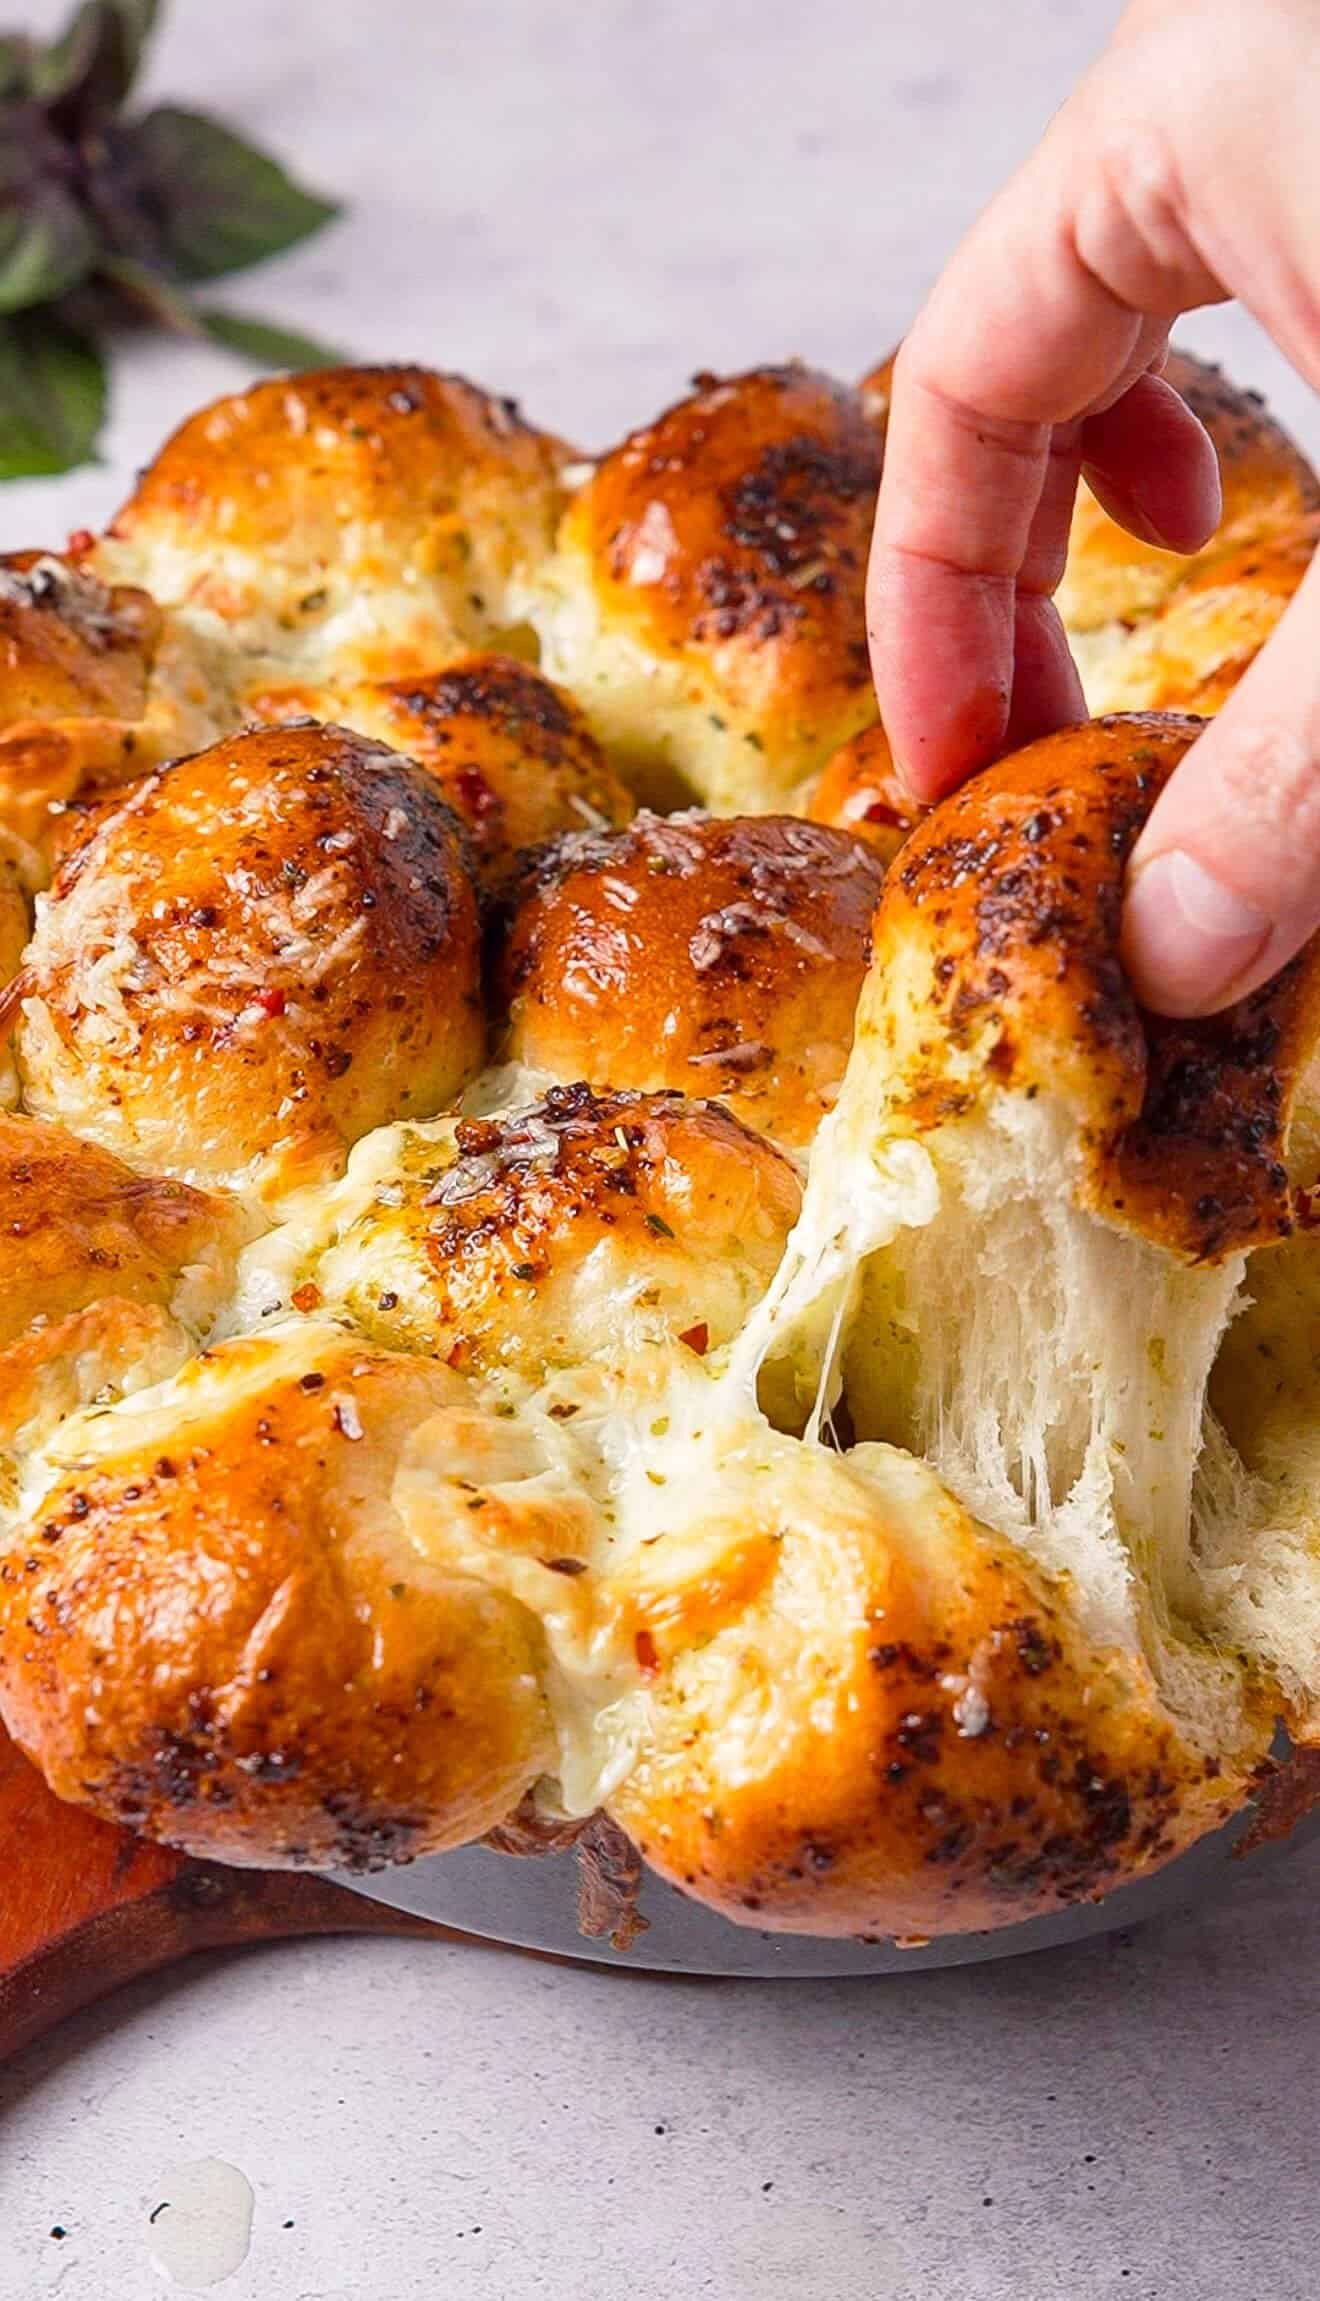
I’ve made this for a casual Sunday dinner, dipped into a good marinara alongside a bowl of soup, and I’ve made it as the centerpiece of an appetizer spread where it was gone in minutes. It’s soft, pillowy, and pulls apart in these craggy, cheese-streaked pieces that look far more impressive than the five minutes of hands-on effort they actually took.
Why you’ll love this recipe
- Genuinely hands-off. You toss, layer, and wait. No dough-making, no kneading, no shaping.
- One bowl and one skillet. Minimal cleanup, which matters more than people admit when you’re hosting.
- Rustic and forgiving. A slightly crowded, craggy loaf looks intentional here, not like a mistake.
- Endlessly adaptable. Swap the filling and you’ve got a completely different bread for a completely different season.
Ingredient notes
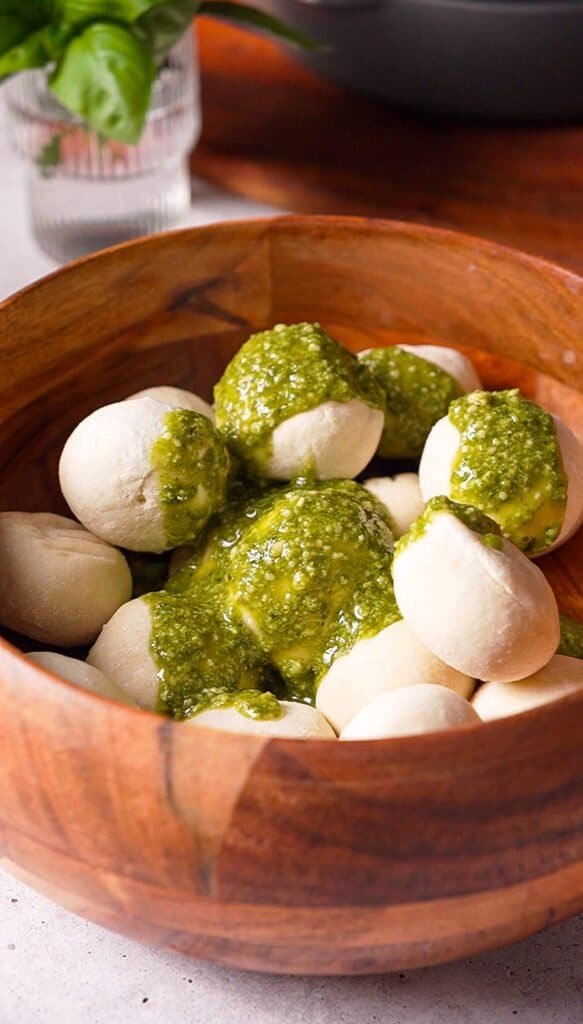
Frozen dinner rolls – I use Rhodes, which are widely available and reliably soft once baked. Keep them frozen until you’re ready to toss them with the pesto. Coating them while still frozen and solid means less sticking and a cleaner toss than trying to coat dough that’s already gone soft and tacky.
Pesto – Store-bought works perfectly well here, and I’d actually encourage it for this particular version, since the whole point is how little effort this takes. Thin it with a tablespoon or two of olive oil before tossing. This isn’t about stretching the pesto further, it’s about loosening it enough that it clings evenly to every dough ball instead of pooling in clumps on a few of them.
Mozzarella – I used mozzarella pearls, which are small enough to use whole, no cutting required. If all you can find is the larger ciliegine size, halve them so they melt and distribute more evenly through the loaf.
Garlic and red pepper flakes – These bloom in warm olive oil after the bread bakes, then get brushed straight over the top. Adding them after baking, rather than before, keeps the garlic flavor sharp and the chili flakes vibrant instead of mellowing out in the oven.
Step-by-step instructions
Start by whisking your pesto with a tablespoon or two of olive oil in a large bowl, just enough to loosen it slightly. Add your frozen dough balls straight from the freezer and toss until every piece is coated. It won’t be perfectly even at first, and that’s fine. The dough will absorb more pesto flavor as it slowly thaws.
Grease your cast iron skillet, then pour in half the pesto-coated dough balls. Scatter the mozzarella over that layer, working it into the gaps between the dough. Add the rest of the dough balls on top, so the cheese ends up sandwiched in the middle rather than sitting only on top or bottom.
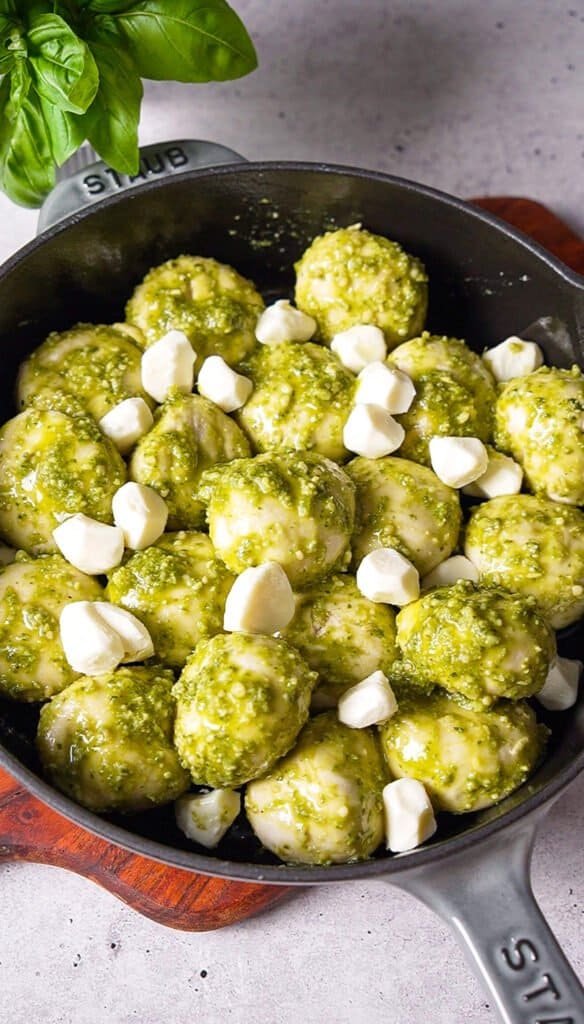
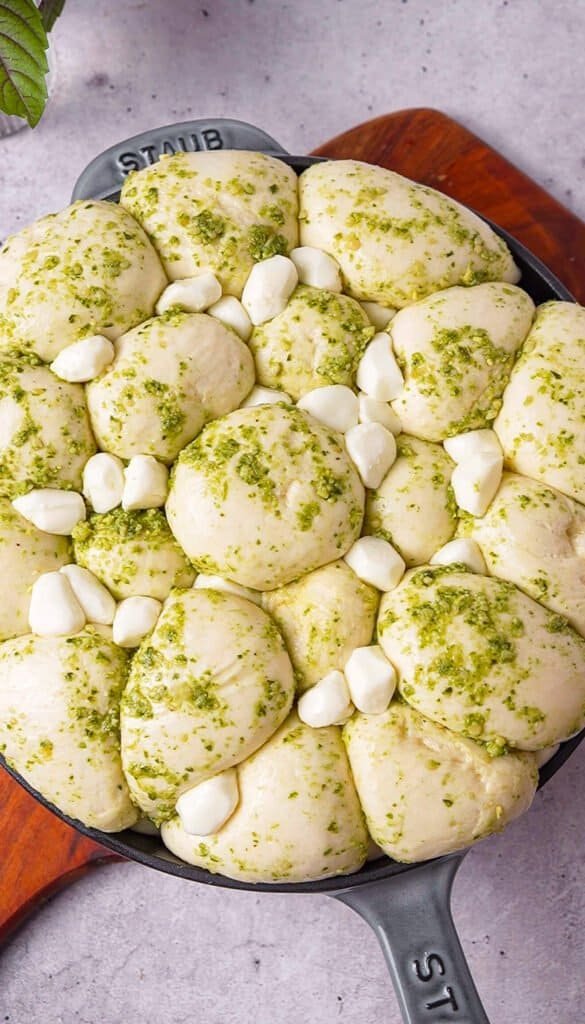
Cover the skillet loosely, either with plastic wrap or a clean towel, and let it sit at room temperature. This is the only part that takes real time, usually three to five hours, though the exact timing depends on how warm your kitchen is. You’re watching for the dough to thaw completely and roughly double in size, not for a specific number on the clock. If you’d rather spread the process out, you can let it rest in the fridge overnight instead, then pull it out and give it another hour or two at room temperature to finish rising before you bake.
Once it’s puffed and pillowy, heat your oven to 375°F. Bake uncovered for 30 to 35 minutes, until the top is deeply golden and the center is cooked through rather than doughy. If it’s browning faster than the center is cooking, a loose sheet of foil over the top will slow that down without stopping the bake.
While the bread is in the oven, warm your remaining olive oil in a small saucepan with minced garlic and red pepper flakes over low heat, just until fragrant, about two minutes. The second the bread comes out of the oven, brush this over the top. The residual heat helps the flavors soak in immediately. Finish with a scatter of flaky sea salt, and serve it warm, straight from the skillet, pulling pieces apart at the table.
Tips for success
A 10-inch skillet with around 15 rolls gives you a slightly cozy, overcrowded bake, and honestly, I like it that way. The pieces press against each other as they rise and bake, which gives you that craggy, rustic pull-apart texture that photographs beautifully and tastes even better. If you’d rather have a neater, more evenly risen loaf with more separation between pieces, size up to a 12-inch skillet or use fewer rolls.
Don’t rush the rise. This is the one step where patience actually pays off, since underproofed dough bakes up dense rather than soft and pillowy. Look for the dough to have visibly doubled and feel puffy to the touch before it goes in the oven.
Brush the garlic oil on immediately after baking, while the bread is still hot. This is what gives the top its glossy sheen and lets the garlic flavor actually penetrate, rather than just sitting on the surface.
Variations and substitutions
This method is really more of a formula than a fixed recipe, which means the filling is where you can have fun with it. A few directions I’ve played with:
For a savory fall version, swap the pesto and mozzarella for sautéed mushrooms, fresh thyme, and Gruyère. For something sweeter and more autumnal, try thin apple slices with Gruyère and a drizzle of honey after baking. Around the holidays, cranberries and brie with a little fresh rosemary make a gorgeous centerpiece for a Christmas table, and pear with gorgonzola and torn prosciutto leans elegant enough for a dinner party starter. In summer, a filling of zucchini, corn, and feta with fresh dill keeps things bright and seasonal.
If you want to dress up this specific pesto version, toasted pine nuts and torn fresh basil scattered over the top after baking add extra texture and color, though I’ll be honest, I’ve made it plenty of times without either and it’s just as good.
Storage and make-ahead
This bread is genuinely best the day it’s baked, while the crust is still crisp and the cheese is at its meltiest. That said, leftovers keep well at room temperature in an airtight container for a day, or in the fridge for up to three days. To reheat, cover loosely with foil and warm in a 325°F oven for about ten minutes, which brings back the soft texture far better than the microwave does.
For make-ahead planning, you have two good options. You can assemble the entire skillet, cover it, and let it rise slowly in the fridge overnight, then bring it to room temperature for an hour or two before baking. Or you can bake it fully ahead of time, cool it, and reheat it covered in foil right before serving.
FAQ
Can I make this ahead of time?
Yes. Assemble the skillet and let it rise slowly in the refrigerator overnight instead of at room temperature, then let it sit out for an hour or two the next day to finish rising before baking.
Can I use a different brand of frozen dinner rolls?
Absolutely. Any frozen yeast roll dough works here, though I’ve found Rhodes to be the most consistent in texture once baked.
Why is my dough taking so long to rise?
Rise time depends heavily on the temperature of your kitchen. In a cooler house, it can take closer to five hours. If you’re in a hurry, placing the covered skillet in a slightly warm (turned off) oven with the light on can speed things along.
Can I use fresh pesto instead of store-bought?
Yes, and either works well here. Store-bought keeps this recipe as low-effort as possible, while homemade pesto will give you a slightly brighter, fresher flavor if you have the time.
Serving suggestions
This bread works equally well as an appetizer or a side. Serve it warm with my Creamy Butternut Squash Soup with Chicken for an easy fall dinner, or pair it with a simple green salad when you want something lighter, or set it out next to something like Baked Boursin with Tomatoes for a spread that covers both warm, cheesy comfort and something a little brighter. If you’re building a full appetizer table, it also pairs beautifully with the Savory Bruschetta Cheesecake Dip, giving your guests both a bread to dip and a bread to simply pull apart on its own.
This post contains affiliate links. If you purchase through them, I may earn a small commission at no extra cost to you.

Easiest Pesto Pull Apart Bread
Ingredients
Method
- Whisk the pesto with 1 to 2 tbsp olive oil in a large bowl to loosen it slightly.
- Add the frozen dough balls and toss until evenly coated.
- Pour half the coated dough balls into a greased 10-inch cast iron skillet.
- Scatter the mozzarella over the layer, then add the remaining dough balls on top.
- Cover loosely and let thaw and rise at room temperature until doubled, 3 to 5 hours (or overnight in the fridge, then 1 to 2 hours at room temperature).
- Preheat the oven to 375°F. Bake uncovered for 30 to 35 minutes, until deeply golden and cooked through, tenting with foil if browning too quickly.
- While the bread bakes, warm the remaining olive oil with garlic and red pepper flakes over low heat for about 2 minutes, until fragrant.
- Brush the warm garlic oil over the loaf as soon as it comes out of the oven.
- Finish with flaky sea salt and serve warm.
Notes
- For a neater, more evenly risen loaf, use a 12-inch skillet or reduce the number of rolls.
- Store leftovers in an airtight container up to 3 days; reheat covered in a 325°F oven for 10 minutes.