
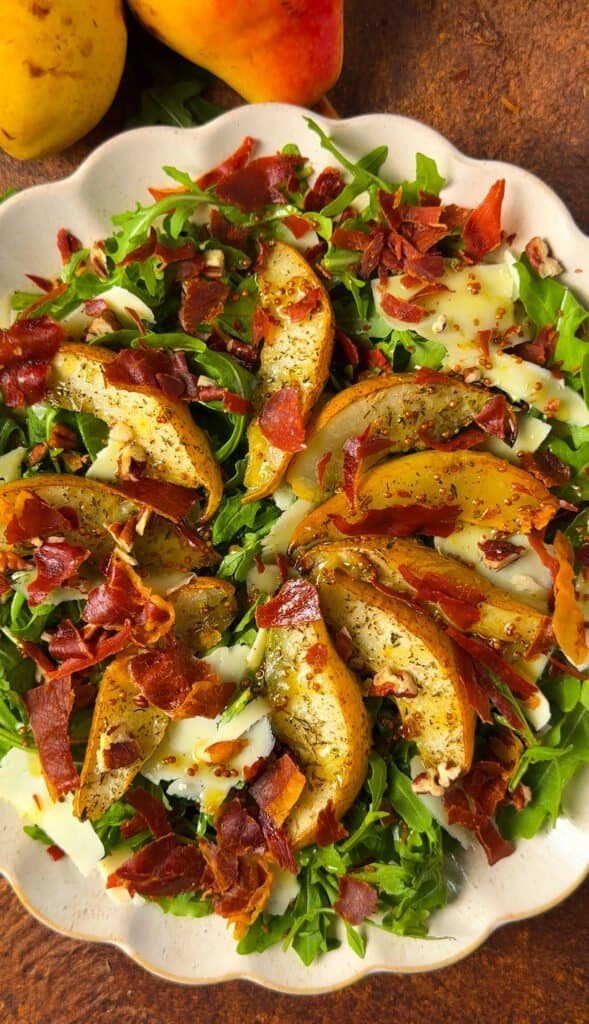
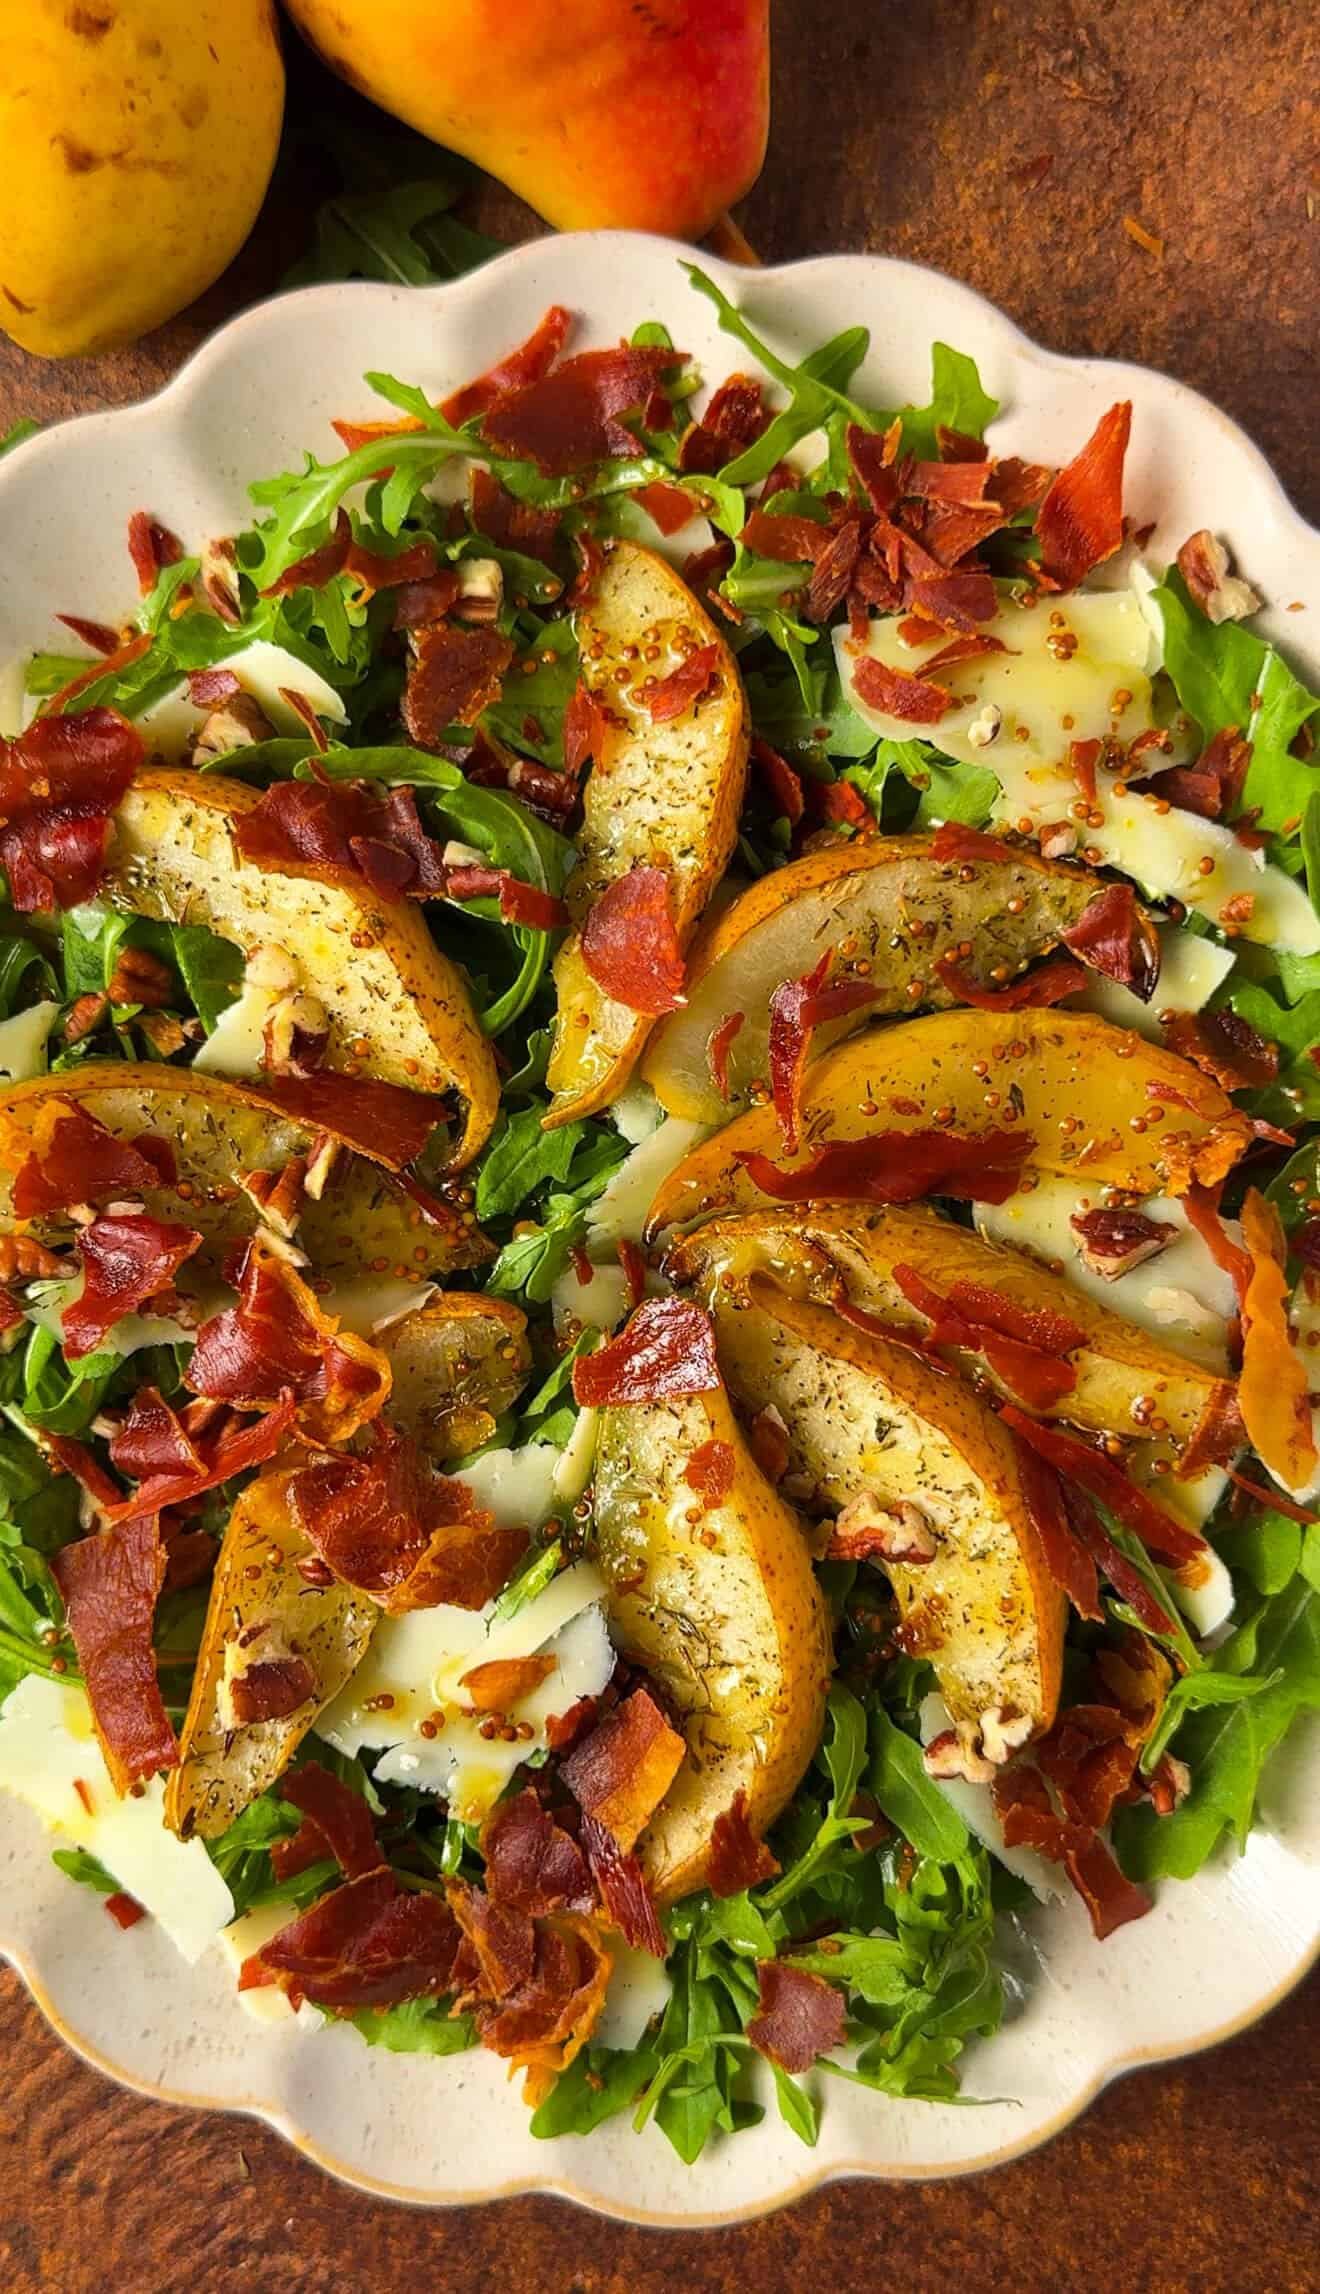
I love pears with something salty, especially when they’re soft around the edges and still have a little bite in the middle. This roasted pear salad with crispy prosciutto is the kind of salad I’d make for lunch with some good bread, then happily serve again when friends come over for dinner. It looks lovely on a platter without needing much arranging.
Roasting gives the pears a deeper flavor, and the crispy prosciutto makes each bite a little more interesting. The dressing has enough sharpness to keep the salad fresh, so even with the roasted fruit, it doesn’t feel heavy.
If you’ve tried my pear crostini with goat cheese and prosciutto, this is another way to enjoy that sweet-and-salty combination. I like having a salad version that can sit beside a main dish or become a simple meal on its own.
You can enjoy it throughout the year whenever you find good pears. It also fits beautifully on a Thanksgiving or Christmas table, especially alongside richer sides. But there’s no reason to wait for a holiday to make it.
Why You’ll Love This Recipe
- Roasting brings out the pears’ flavor. They become tender, with lightly golden edges, while keeping enough shape to serve in wedges.
- The topping has a lovely crunch. Crispy prosciutto adds a different texture from the toasted pecans, so the salad never feels like just greens and fruit.
- Sharp white cheddar works so well here. It gives the salad a savory bite without overpowering the pears.
- You can prepare a few things ahead. Make the dressing and toast the pecans the day before, then finish the remaining components closer to serving.
Ingredient Notes
Firm-ripe pears
The pears make the biggest difference in this recipe. Choose fruit that gives just slightly near the stem but still feels firm through the body. If the entire pear feels soft, it will be difficult to roast and turn without breaking.
Bartlett pears work well when they’re at that firm-ripe stage. Bosc and Anjou are also options, though you may need to adjust the roasting time. Don’t worry too much about finding one particular variety. Start with pears that taste good and can hold a clean wedge when cut.
Taste a small piece before roasting. A very underripe pear can soften in the oven and still taste rather bland. You want some sweetness already there.
I leave the skin on. It gives the wedges a nice outline and saves a little preparation. If you prefer peeled pears, you can peel them, but handle the roasted pieces gently because they will be more delicate.
Thinly sliced prosciutto
Thin prosciutto crisps more evenly than thick slices. Look for pieces you can separate and spread out on the baking sheet without folding them over themselves.
A few tears don’t matter. You’ll break the prosciutto into pieces after baking, so there’s no need to save the prettiest slices for this recipe.
The important part is giving it room. Overlapping areas hold moisture and can stay chewy while the exposed edges darken. If a slice is especially long or awkward to arrange, tear it into two pieces before baking.
Prosciutto also adds salt, which is worth remembering when seasoning the dressing. Taste the finished combination before adding extra salt to the platter.
Sharp white cheddar
I use sharp white cheddar because I want to taste the cheese alongside the pears. A mild cheddar can get a little lost once the dressing and prosciutto are added.
Buy a block and shave it into thin pieces. A vegetable peeler is useful here, although a sharp knife works too. The shavings don’t need to be identical. Some wider curls and smaller broken pieces look natural scattered between the fruit.
Very mature cheddar may crumble rather than shave neatly. That’s fine. Use those pieces instead of trying to force long curls from a crumbly block.
White cheddar gives the salad a pretty appearance, but sharp yellow cheddar can replace it. The flavor and texture matter more than the color.
Arugula or mixed greens
Arugula brings a peppery flavor that works nicely with roasted pears. If you prefer something milder, use a mixture of arugula and spring greens.
Check the leaves before using them, even if the package says they’re ready to eat. Remove any that look wilted or wet. If you wash the greens, dry them thoroughly so the dressing can coat them properly.
A salad spinner helps, but you can also spread the leaves on a clean kitchen towel and gently blot away moisture. Wet greens make the finished salad watery, particularly once the pears and dressing are added.
Keep the amount of greens close to the recipe. A much larger handful may look harmless, but it spreads the toppings and dressing too thinly.
Pecans and dried thyme
Plain pecans are my choice for this salad. Toasting brings out their flavor without adding more sweetness, which the pears already provide.
Roughly chop them so there are still pieces large enough to notice. Finely chopped nuts tend to slip through the greens and collect underneath the salad.
Dried thyme gives the pears a subtle savory flavor. You don’t need much. If the leaves are coarse, rub them between your fingers before adding them so they distribute more evenly.
I wouldn’t add candied pecans on top of everything else without adjusting the dressing. They would move the salad in a sweeter direction than intended.
Maple Dijon Dressing for Pear Salad
The dressing is simple, but it has enough acidity to cut through the cheese and bring some brightness to the roasted fruit. Apple cider vinegar works especially well because its fruity flavor doesn’t feel out of place with pears.
Whole-grain Dijon adds small mustard seeds and a little texture. Smooth Dijon can work if that’s what you have, though the finished dressing will look different and the mustard flavor may vary by brand.
Use pure maple syrup for the small amount of sweetness. It softens the vinegar’s edge without turning the dressing into a sweet glaze.
Taste it with a leaf and a piece of pear rather than only from a spoon. A dressing can seem quite sharp on its own, then taste just right once it’s spread over the salad.
Be restrained with the salt at first. Both the cheddar and prosciutto contribute plenty, and you can always add a little more after tasting everything together.
You may not need all the dressing. The greens should have a light coating, with enough left to drizzle over the pears if needed. A puddle underneath the platter won’t improve the salad.
Tips for Success
Give the pear wedges enough space
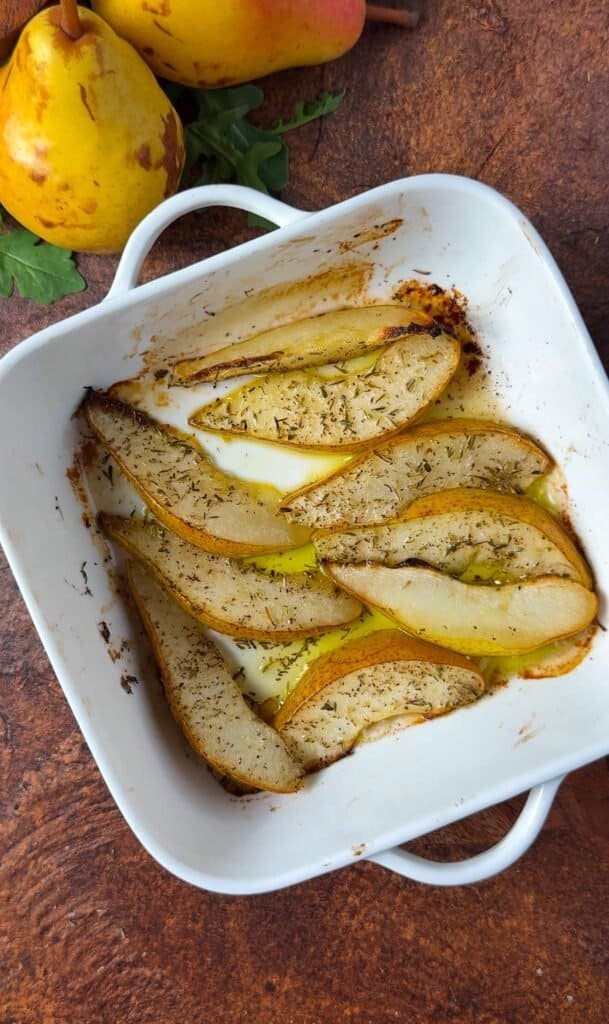
The pears need room on the baking sheet so moisture can escape. When the wedges are crowded or piled together, they tend to soften without developing much color.
Cut them into fairly even pieces. Small differences are normal, but a very thin wedge will cook much faster than a thick one. Check those smaller pieces first rather than leaving them in until every wedge looks identical.
Arrange a cut side against the parchment for better contact with the hot pan. When it’s time to turn them, use a thin spatula and lift gently.
Pay attention to texture as much as color. If the pears are tender and starting to feel fragile, take them out even if they haven’t become deeply golden. Riper pears may soften before they develop the same color as firmer fruit.
Don’t overbake the prosciutto
Prosciutto firms as it cools. It may still have a little flexibility when it comes out of the oven, and that doesn’t automatically mean it needs more time.
Start checking early, particularly if the slices are very thin. The edges should darken slightly, but they shouldn’t turn very dark brown.
Let it cool before breaking it into pieces. You’ll get a better idea of the final texture, and it will be easier to scatter over the salad.
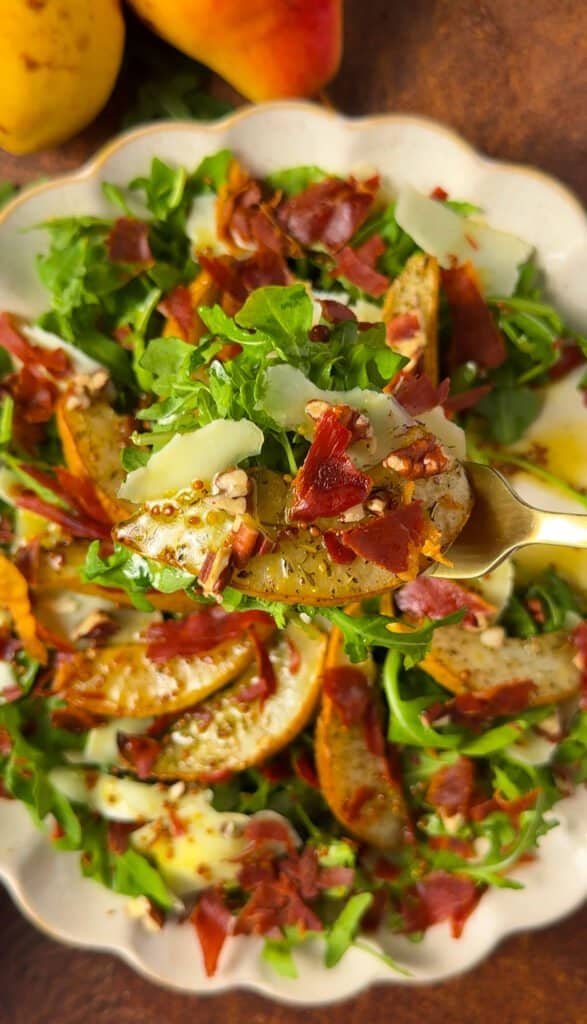
Keep those pieces separate until serving. Once they touch the dressing and moist fruit, they gradually soften. Adding them last makes a noticeable difference.
This is also what gives the recipe a different feel from my caramel pear and prosciutto salad, which uses feta and a lemon dressing. Here, the crisp topping is a big part of the appeal.
Let the pears cool before assembling
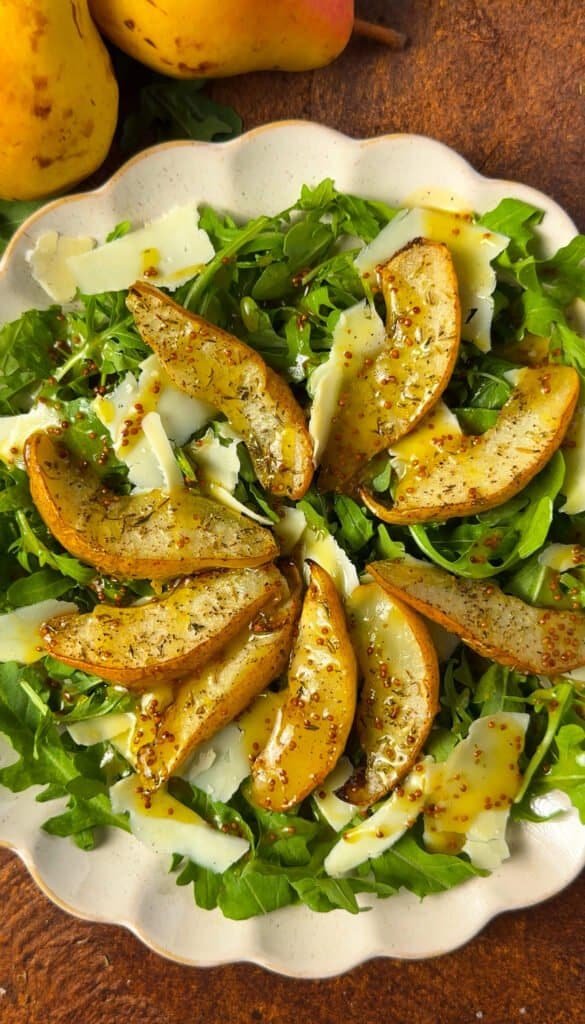
Hot pears will wilt the greens underneath them. Give them time to cool until they’re barely warm before arranging the salad.
They don’t need to be hot for this dish to taste good. Room-temperature pears work well too, which makes serving a little easier when you’re finishing other parts of the meal.
Use a wide platter or shallow bowl so the toppings can spread out. A deep bowl hides the pears and makes it harder to get a little of everything in each serving.
Once the fruit and cheese are arranged, avoid tossing the whole salad again. Serve by lifting from underneath with broad serving spoons, keeping the tender wedges as intact as possible.
Variations and Substitutions
Try a different cheese
Aged Gouda or Manchego would work in place of white cheddar. Choose a cheese with enough flavor to stand up to the pears, then shave or slice it thinly.
Goat cheese is an option if you want a softer texture. Crumble it over the greens rather than arranging it like cheddar shavings.
These changes will affect the saltiness of the finished salad. Taste before adjusting the dressing, especially if you choose a particularly salty cheese.
You don’t need several cheeses at once. One gives the salad enough substance while leaving room for the fruit and prosciutto.
Adjust the greens or nuts
Baby spinach can replace some or all of the arugula for a milder salad. A fresh spring mix is another easy choice.
Walnuts can replace the pecans. Toast them gently and let them cool completely before adding them. They have a slightly different flavor, but still give the salad that welcome crunch.
If you need to leave the nuts out, the crispy prosciutto will still provide texture. For an allergy, check the other ingredients and preparation surfaces as well.
Avoid adding lots of extra toppings simply because they’re available. The salad already has several distinct flavors, and the pears should remain easy to taste.
Leave out the prosciutto
For a meat-free version, omit the prosciutto and add a few more toasted pecans if you like. Taste a bite with the cheese before deciding whether it needs more salt.
If you’re serving someone who follows a vegetarian diet, check that the cheese uses vegetarian rennet.
For another fruit-and-cheese salad that doesn’t require roasting, try my apple, burrata, and prosciutto salad wreath. It has crisp fresh apple and creamy burrata, so it’s a different option when you’d prefer to leave the oven off.
Make-Ahead and Storage
Prepare the dressing and pecans ahead
The dressing can be made a day ahead and refrigerated in a covered jar. Give it a good shake or whisk before using.
Olive oil sometimes thickens in the refrigerator. If that happens, let the dressing stand briefly until it loosens, then mix it again. There’s no need to change the recipe because it looks thicker when cold.
Toast the pecans ahead as well. Cool them completely before transferring them to an airtight container at room temperature. If you close the container while they’re warm, trapped moisture can affect their texture.
You can also wash and dry the greens ahead. Refrigerate them with a clean paper towel to absorb excess moisture, keeping them separate from the dressing.
Roast and assemble on serving day
I would roast the pears and crisp the prosciutto on the day you plan to serve the salad. That gives you the best control over the fruit’s texture and the topping’s crunch.
The two trays can share the oven, but they need separate attention. Prosciutto cooks much faster than the pears, so set a timer for it rather than relying on the pear roasting time.
While the pears cool, finish the dressing and prepare the serving platter. Keep the cheese chilled until needed, and leave the prosciutto separate from anything moist.
Dress the greens close to serving time. If dinner is running late, it’s better to wait than to have a fully assembled platter sitting while the leaves soften.
Store leftover salad separately when possible
If you know you won’t eat the whole recipe, dress only the portion you plan to serve. Separate components hold their texture better than a fully dressed salad.
Refrigerate the pears, cheese, greens, and any reserved prosciutto in separate covered containers. Keep the pecans dry and separate, and refrigerate the dressing in its own jar.
Already assembled leftovers should be refrigerated promptly and enjoyed the next day for the best texture. Expect softer leaves and less crunch from the prosciutto.
The pears and cheddar are still worth saving even if the greens have lost some freshness. You can add them to a new handful of greens rather than trying to revive a heavily dressed salad.
I wouldn’t freeze this salad. Thawed greens and roasted pears won’t have the texture you want here.
Frequently Asked Questions
What pears are best for roasted pear salad?
Firm-ripe Bartlett, Bosc, and Anjou pears can all work. Look for fruit with a little give near the stem and a firm body.
Ripeness matters more than the variety name. A very soft Bartlett will behave differently from a firm one, so check the pears themselves and watch them while they roast.
Do I need to peel the pears?
No. I leave the skin on for this recipe. It gives the wedges a defined edge and keeps the preparation simple.
If you prefer peeled fruit, peel the pears before cutting them into wedges. The roasted pieces may be more delicate, so lift and turn them carefully.
Can roasted pear salad be served cold?
Yes. You can serve it with cooled pears, and the greens and cheese can come straight from the refrigerator.
If the pears have been chilled, you may prefer to let them lose a little of that refrigerator chill before assembling. They don’t need reheating. The main thing to avoid is placing hot fruit directly on tender greens.
Can I double the recipe?
Yes, but increase the baking space along with the ingredients. Doubling the pears on the same crowded tray will change how they roast.
Use additional baking sheets or work in batches, depending on your oven space. Keep the prosciutto in a single layer too.
For serving, two shallow platters are often easier than one very large bowl. You can dress and finish the second platter later if you’re serving a larger group over a longer meal.
What to Serve with Roasted Pear Salad
This roasted pear salad works beside roast chicken, pork tenderloin, or a simple piece of grilled meat. The dressing gives it enough brightness to sit comfortably next to something richer, while the roasted fruit makes it feel substantial.
For lunch, I’d serve a larger portion with good bread. The recipe makes six side servings, so allow fewer portions if the salad is the main part of the meal.
My roasted potatoes au gratin would make a lovely warm side alongside it. The creamy potatoes and lightly dressed greens bring different textures to the plate.
And when Thanksgiving or Christmas comes around, the same salad fits right beside my roasted citrus turkey with orange and sage. You don’t need to change the recipe or add extra decorations to make it feel at home on the holiday table.
It also works as a first course for dinner with friends. Divide the greens and toppings among small plates, keeping a few pieces of crispy prosciutto for the top of each serving. Finish just before bringing the plates to the table.
This post contains affiliate links. If you purchase through them, I may earn a small commission at no extra cost to you.

Roasted Pear Salad with Crispy Prosciutto
Ingredients
Method
- Preheat the oven to 425°F.
- Line two baking sheets with parchment paper rated for this temperature.
- Halve the pears lengthwise.
- Remove the cores.
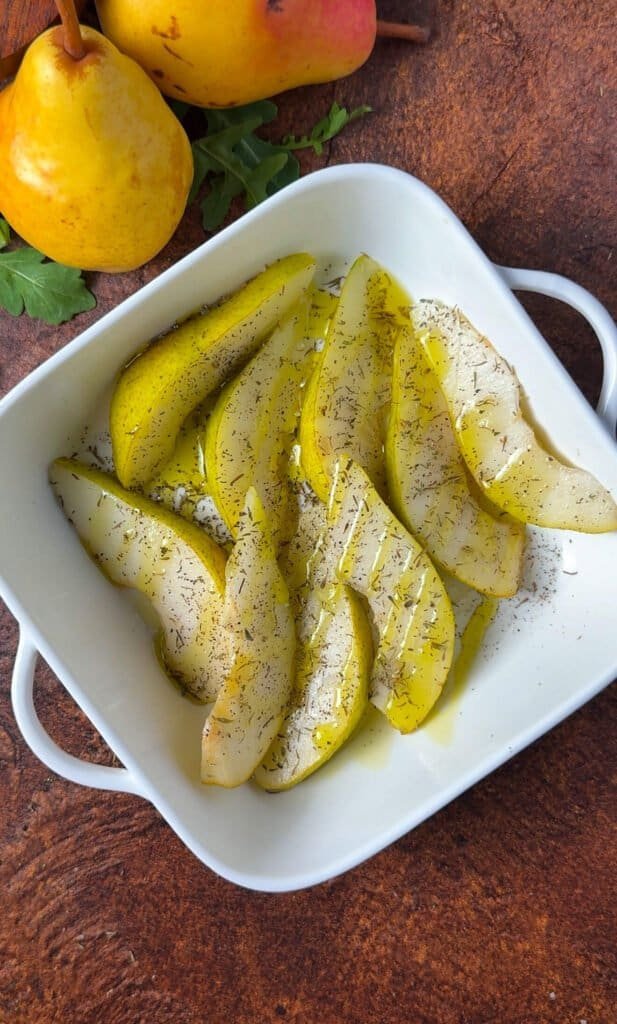
- Cut each pear into 8 wedges, leaving the skin on.
- Gently toss the pears with 1 tbsp olive oil, dried thyme, a small pinch of salt, and black pepper.
- Arrange the wedges on one baking sheet with a cut side down, leaving space between them.
- Roast for 15–20 minutes, turning once, until lightly caramelized and tender but still holding their shape.
- Let the pears cool until barely warm, about 10 minutes.
- Arrange the prosciutto on the second baking sheet without overlapping.
- Bake alongside the pears for 6–10 minutes, checking after 5 minutes, until the edges darken slightly and the slices begin to firm.
- Let the prosciutto cool completely.
- Break the cooled prosciutto into pieces.
- Toast the pecans in a dry skillet over medium-low heat for 4–6 minutes, stirring frequently, until fragrant.
- Transfer the pecans to a plate to cool.
- Whisk together the extra-virgin olive oil, apple cider vinegar, whole-grain Dijon mustard, and maple syrup.
- Season the dressing lightly with salt and pepper.
- Lightly toss the greens with about half the dressing.
- Spread the greens over a wide serving platter.
- Arrange the roasted pears over the greens.
- Tuck the cheddar shavings between the pears.
- Scatter the pecans over the salad.
- Drizzle with more dressing as needed.
- Add the crispy prosciutto just before serving.
Notes
- Pears: Use firm-ripe pears that give just slightly near the stem. Very soft pears can fall apart during roasting. Bosc or Anjou can replace Bartlett; adjust the roasting time as needed.
- Timing: Bake the pears and prosciutto on separate trays at the same time, removing the prosciutto first. Prepare the pecans and dressing while the pears roast. Some cooling time may overlap with the remaining preparation.
- Prosciutto: The slices crisp further as they cool. Start checking after 5 minutes to avoid overbaking.
- Assembly: Let the pears cool until barely warm before adding them to the greens. Add the prosciutto last to preserve its crunch.
- Make ahead: Prepare the dressing and toast the pecans a day ahead. Refrigerate the dressing and keep the completely cooled pecans in an airtight container at room temperature. Roast the pears and crisp the prosciutto on serving day.
- Substitutions: Walnuts can replace pecans. Aged Gouda or Manchego can replace white cheddar. Use spring greens or baby spinach for a milder alternative to arugula.
- Storage: Refrigerate leftover salad promptly and enjoy the next day for the best texture. When possible, store undressed components separately.